Monthly Archives: December 2014

Building an atmega1284p prototype

This project was featured on Hackaday and the Atmel blog.

For the next step in my Apple 1 replica project I decided I wanted to replace the Arduino Mega board with a bare Atmega MPU with the goal of producing a two chip solution — just the Atmel and the 6502, no glue logic or external support chips.

I had been stockpiling parts for this phase of the project for a while now, so I sat down to lay out the board based on a small 5×7 cm perfboard.

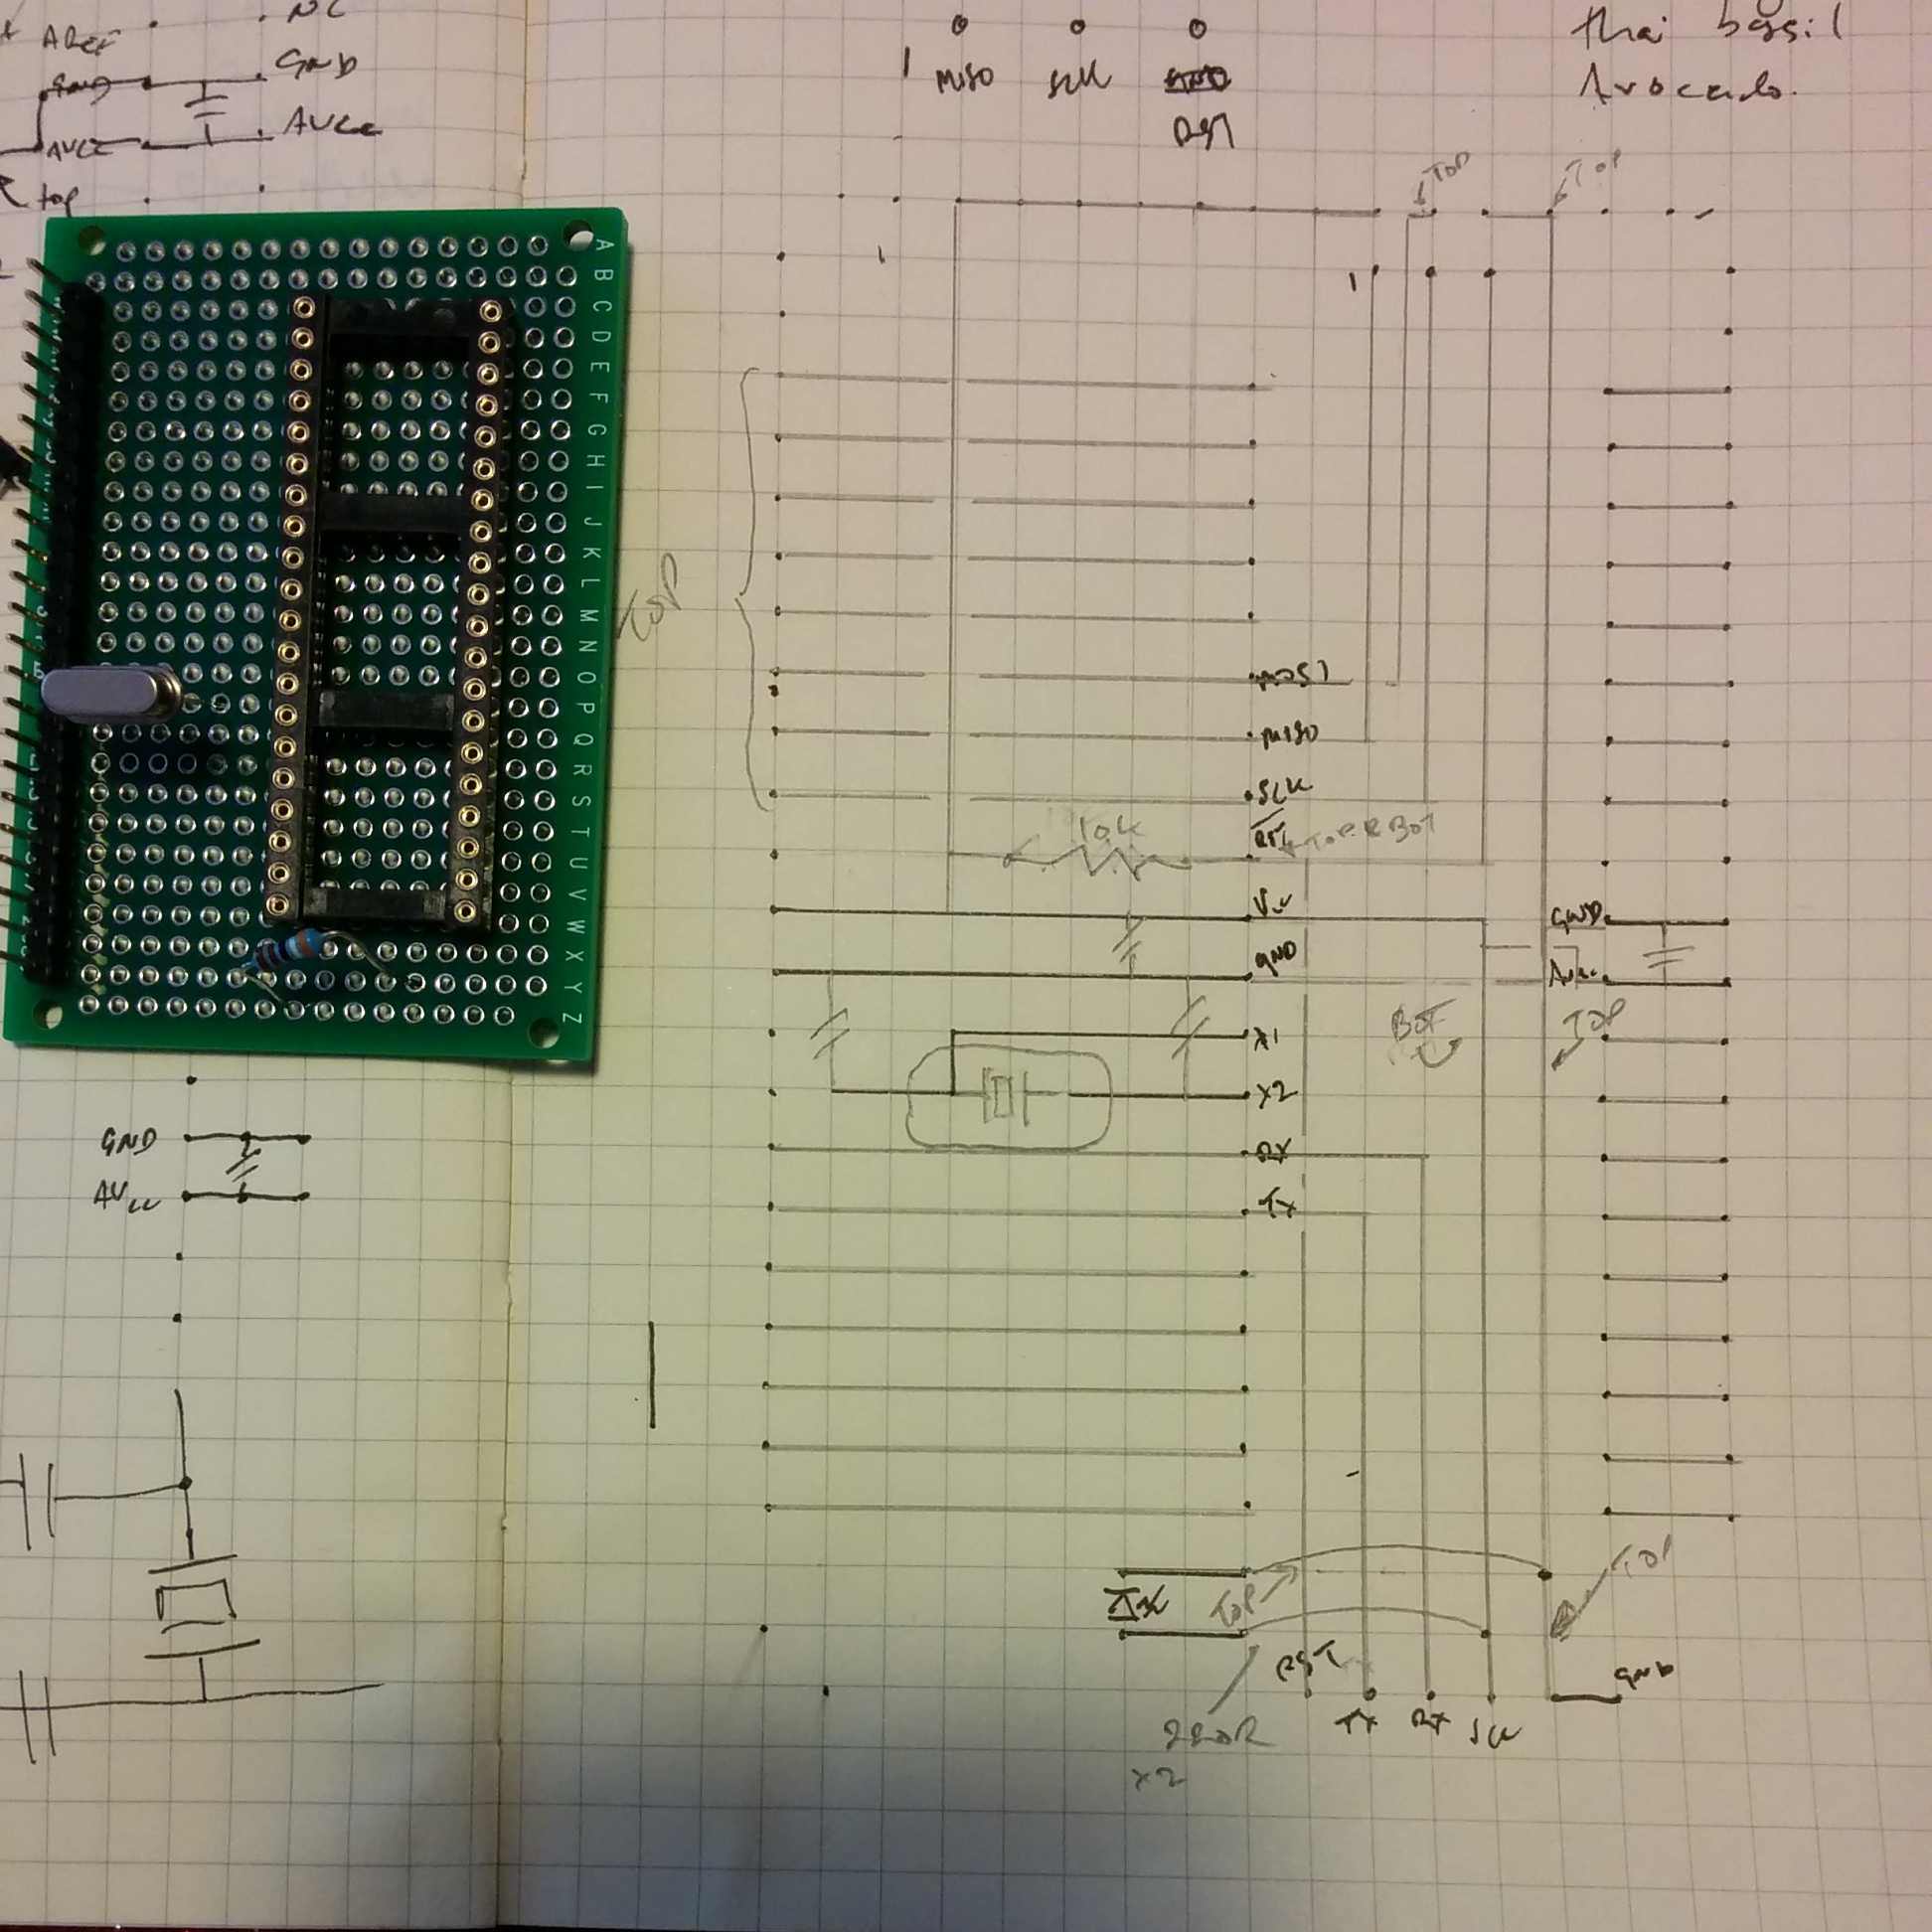
Perfboard sketch

Perfboard sketch

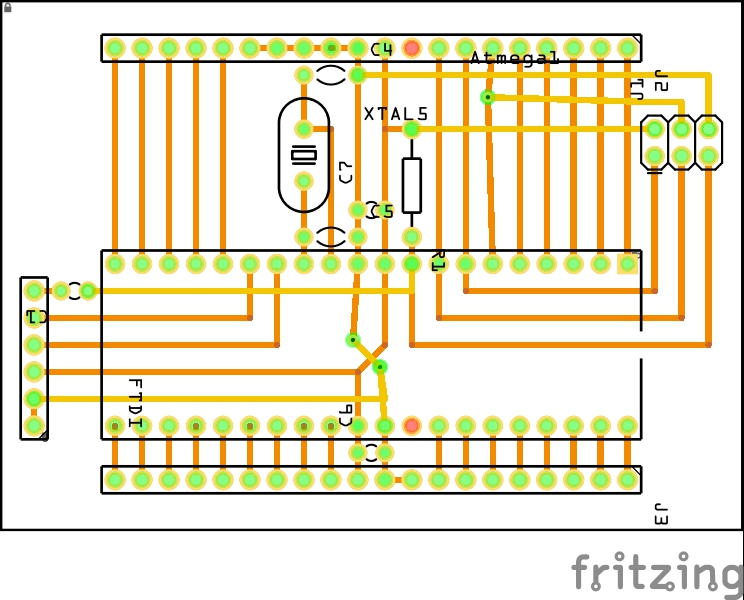
The trickiest piece was fitting the crystal and load capacitors into the design without disrupting to many of the other traces. It worked out well so I decided to add ICSP and FTDI headers and tried my hand at laying out the board using Fritzing.

Fritzing layout

Fritzing layout

The picture above is one of several designs I tried in Fritzing. I designed another that uses a flood fill ground plane to eliminate all the vias. We’ll see how that one turns out in a few weeks.

Rant: Cadsoft Eagle might be the industry standard, at least amongst open source hardware hackers, but it truly embodies the “worse is better” philosophy. Maybe one day my Altium Circuitmaker invitation will arrive (hint hint).

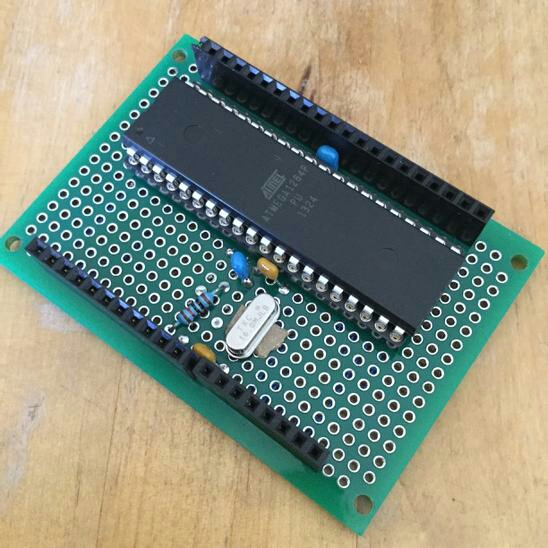
The finished product

The finished product

While I’m waiting for my PCBs to be delivered I decided to build a simplified version. The FTDI and ISCP headers have been left off as they are readily accessible from the headers on the left hand side.

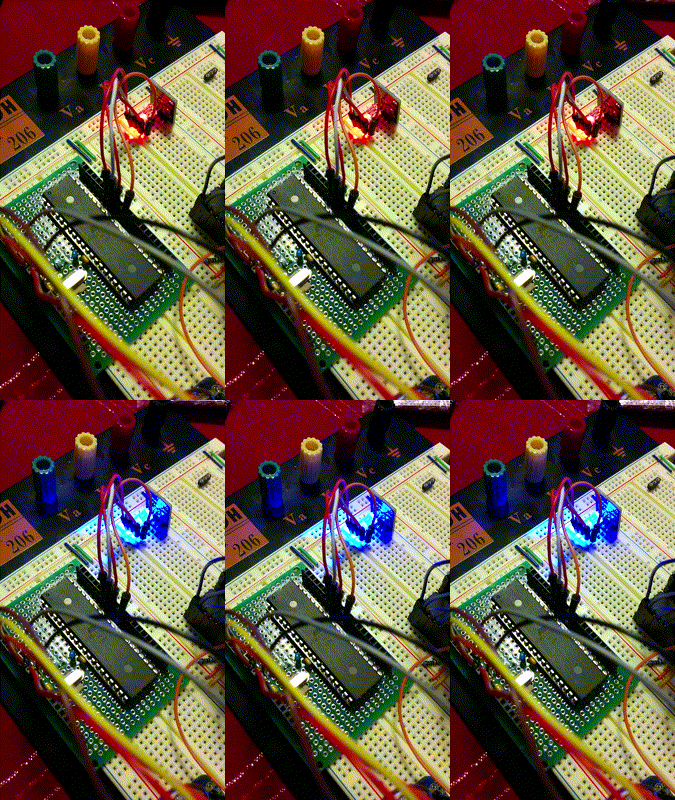
Demo time


It worked, first time.

Bootloaders

The atmega1284p’s I ordered were unprogrammed. Getting Optiboot installed on them is handled nicely by Manicbug’s Mighty1284 Arduino support package.  There are only two small issues of note.

  1. Due to cross talk between the XTAL1 and RX0 pins, serial communication may be unreliable. The solution to this is configure the clock source to use Full Swing mode (rather than the default low power mode). This is done by setting the relevant fuse settings in boards.txt like so
    mighty_opt.bootloader.low_fuses=0xf7
  2. Mighty1284 only supports Arduino 1.0.x, not the newer 1.5.x betas. This might be an issue if you are a fan of the improvements in Ardunio 1.5.x as it doesn’t look like Mighty1284 is being updated.

Next steps

I’m smitten with the 1284p. It feels like the right compromise between the pin starved 328 and the unfriendly 2540 series. The 1284p supports more SRAM than either of its counterparts and ships in a package large enough that you get a full 24 pins of IO.

This experiment gave me the skills and the confidence to continue to design my replica project around the 1284p. I had originally intended to build the replica in two boards, possibly adding a third with some SRAM. Routing the upper 6502 board will be harder than the lower 1284p board, so I may have to wait til my Fritzing samples return to judge the feasibility of that approach.

Resources

Make your own Apple 1 replica

Woot! This project was featured on Hackaday.

mega6502

mega6502, a big mess of wires

No Apple 1 under the tree on Christmas Day ? Never mind, with a 6502 and an Arduino Mega 2560 you can make your own.

The Apple 1 was essentially a 6502 computer with 4k of RAM and 256 bytes of ROM. The inclusion of a 6821 PIA and a Signetics video encoder meant that the Apple 1 shipped with its own 2400 baud dumb terminal built in. Just supply your own keyboard, composite monitor, and you were in business.

The good news is we can emulate the RAM, ROM, PIA, and all the glue logic with an Arduino.

The hardware

To validate the idea that an Ardunio could provide a stable clock for the 6502, I started by breadboarding the project.

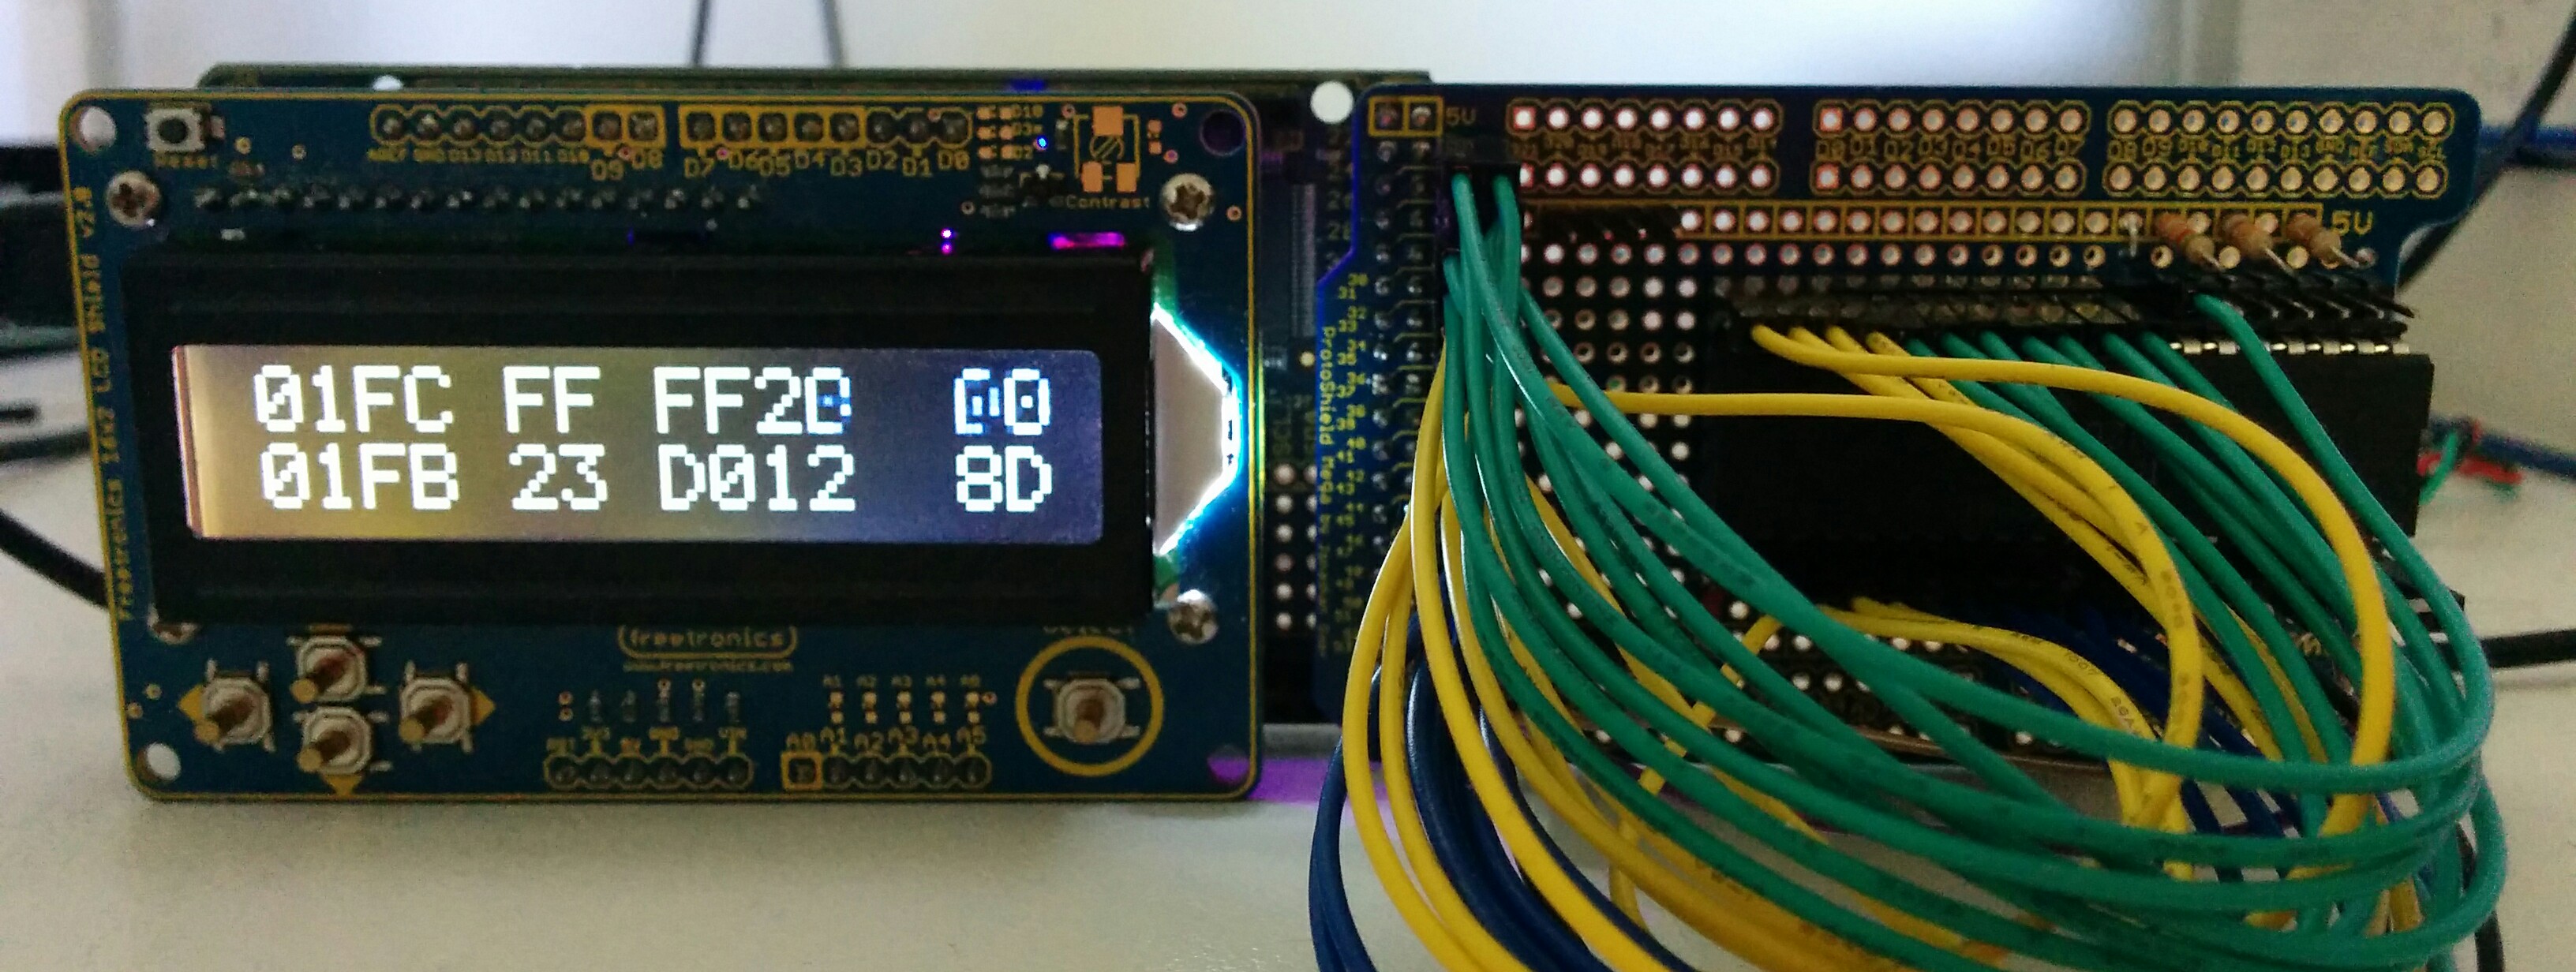
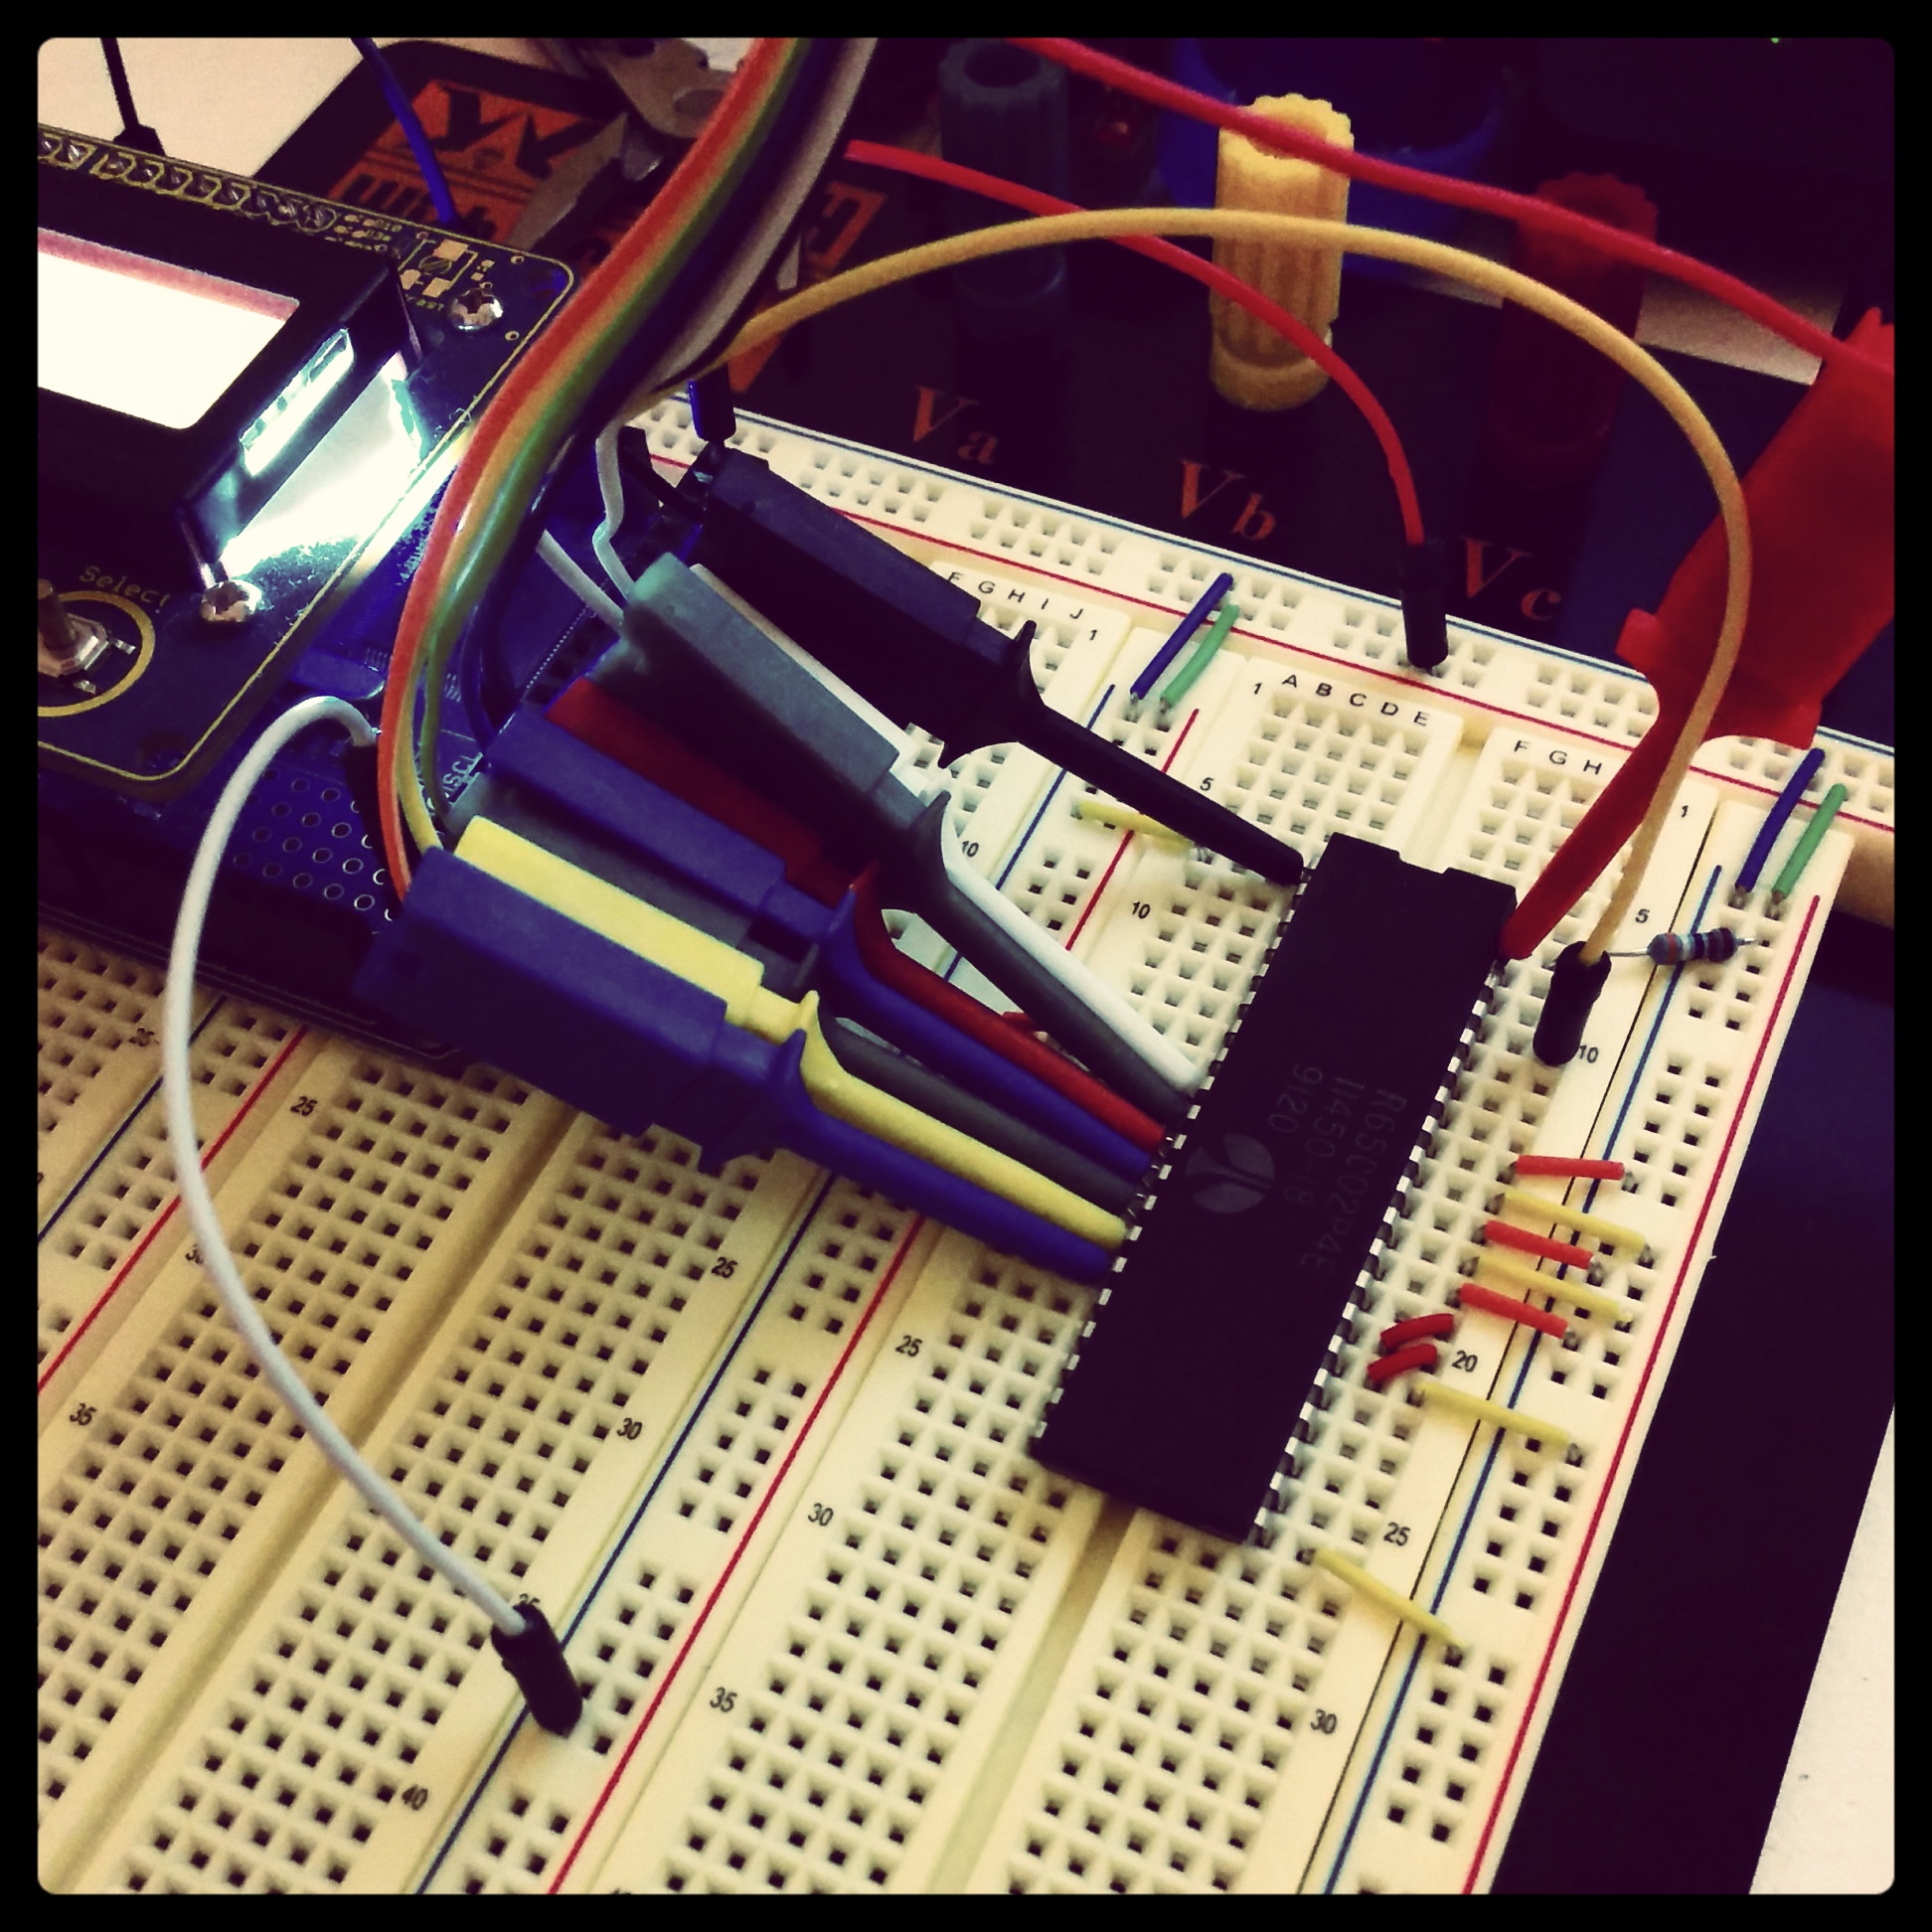
6502 strapped for $EA

6502 strapped for $EA

The result was a success, with a tight assembly loop I was able to generate a 1Mhz clock with a roughly 50% duty cycle.  So it was on to a prototype.

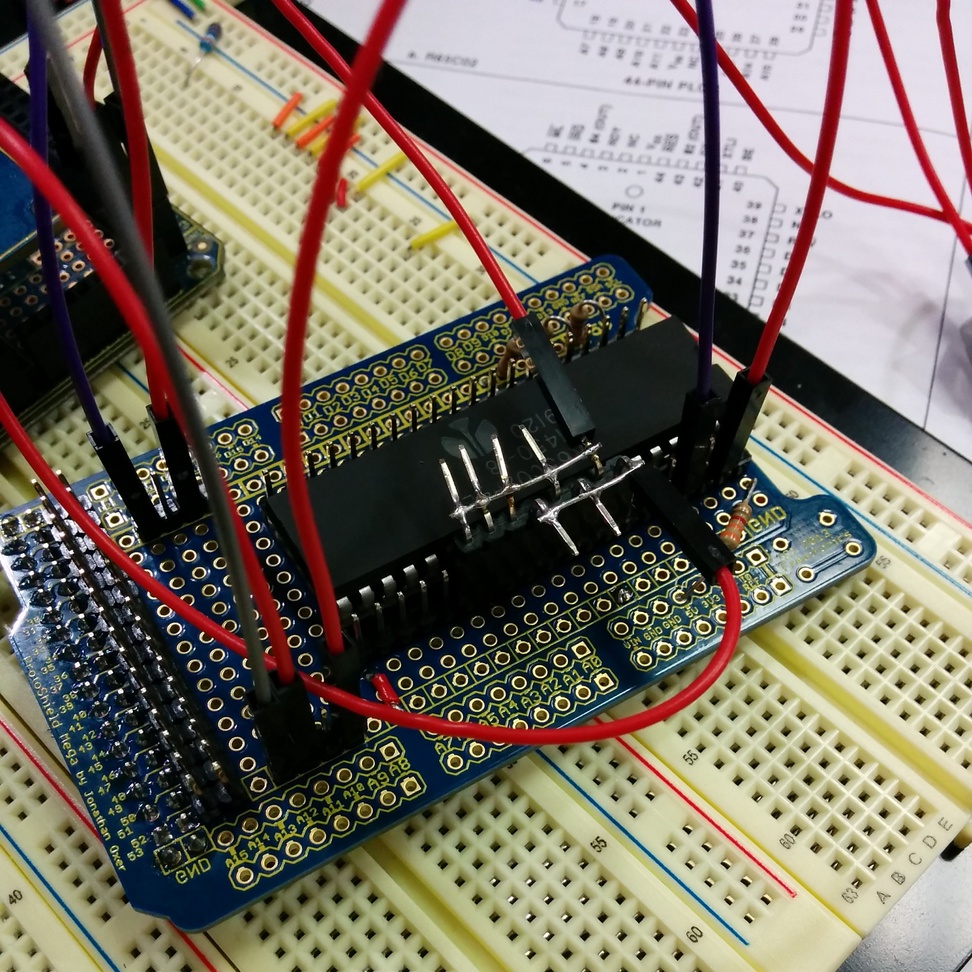
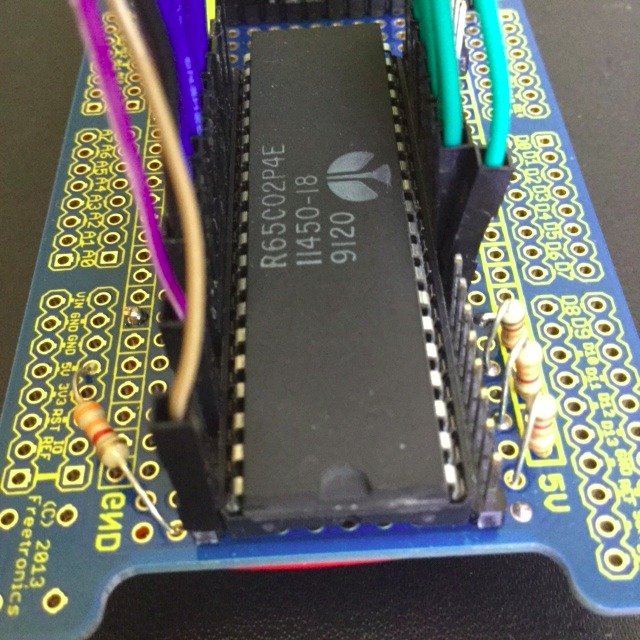
Prototype 6502 "sidecar"

Prototype 6502 “sidecar”

The protoshield has 0.1 inch connectors for the 40 pins on the 6502 and the 40 something pins on the Ardunio Mega’s expansion header allowing me to jumper between the 6502 and the Arduino. The strange jumper block presents $EA on the data bus unconditionally, this is called free running mode.

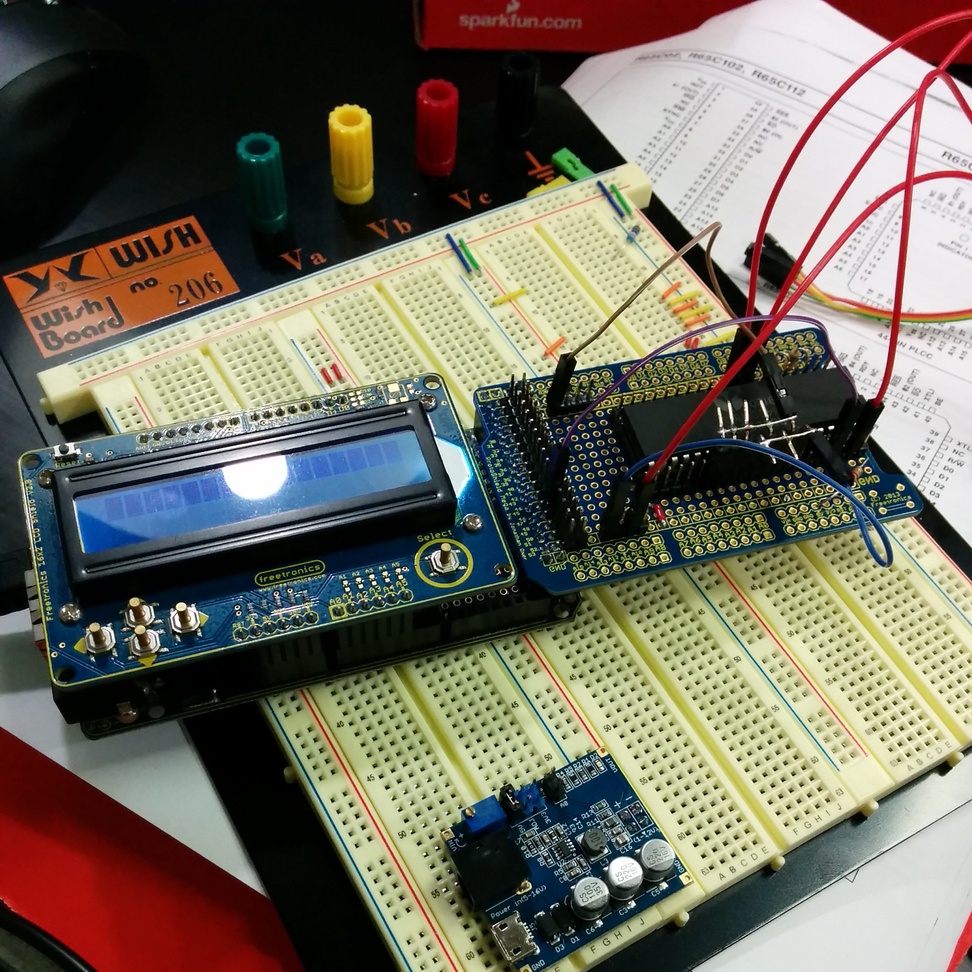
Mega6502 prototype

Mega6502 prototype

Because I wanted to use an LCD panel for debugging and the patch wires on the protoshield would not fit under the LCD shield I mounted the shield backwards and upside down, which retained the same pin outs (including 5v on the top). I called this prototype design the “sidecar”.

Sidecar wiring in detail

The schematic for wiring the sidecar to the Arduino is detailed in the README file.

The software

At the moment the software is a simple Arduino IDE sketch, you can find it on Github.

Clock

The Arduino provides the ϕ0 clock signal as part of the main loop() function. The 6502 interacts with the outside world on the falling edge of this clock (actually a few ns after ϕ0, the falling edge of ϕ2). It produces the address and read/write signals on the rising edge of ϕ0.

Different 6502 models have different requirements for the minimum and maximum length of each phase of ϕ0. The original NMOS 6502 required a clock of at least 100khz to avoid loosing internal CPU state, which made single stepping more complicated. With the Rockwell 65c02 I am using the ϕ0 low phase must not exceed 5μs, but the clock signal can remain high indefinitely (the fully static WDC 6502 removes any restriction on a minimum clock).

We can use this property to generate a stable ϕ0 low around 500 ns (the minimum instruction time on a 16Mhz Atmega is 62.5ns), then raise ϕ0 and do our processing, even take an interrupt. Because I have the 4Mhz 65c02 version, we can even make the ϕ0 low period shorter, to allow our high pulse to take longer in an effort to reach the 1Mhz clock target.

Laughton Electronics has published a fantastic page if you want to learn more about the 6502 timings.

Ram

The Apple 1 divided the 6502’s address space into 16 4k banks which could be assigned to RAM, ROM, or I/O.

The 2560 includes 8kb of SRAM, so we dedicate 4k to be the bottom bank of ram starting at $0000, which is more than enough for a usable replica. For Apple 1’s with 8kb of ram, the second bank of ram was usually strapped to $E000 and used for BASIC. The nice property of this is we can replace the $E000 bank with a ROM image mapped to that location (BASIC did not expect to be able to write to memory at $E000) and achieve the same effect without providing another 4k of RAM.

ROM

The original 256 byte Woz monitor rom is provided at $FF00. For simplicities sake the ROM is mirrored at every page in the $F000 address space.

I have tested a few of the popular ROM images like A1Assembler and Applesoft-lite but only include the Woz monitor rom in the source distribution. Enterprising readers should have little difficulty modifying the source code to include additional ROM images.

Input and output

The Apple 1 interfaces to the keyboard and screen via four registers from the 6821 PIA chip mapped into the address space at $D000.

When a key is pressed on the keyboard, the high bit of $D011 is latched high, this can be detected by the 6502 ROM monitor which then reads $D010 to fetch the keycode, which is conveniently encoded as 7bit ASCII.

Output is similar, the 6502 polls $D013 until the PIA reports that the video encoder is not busy then the character to write to the screen is placed in $D012.

It is straight forward to map these reads and writes to these addresses to the Arduino serial port. Again for simplicity, the PIA is mirrored to every page in $D000.

The speed

Like my previous projects, performance is always a problem. Assuming a 50% duty cycle for the ϕ0 clock, a 16Mhz Atmel has 8 cycles to decode the address and read/write the data. This is basically impossible. However, as I am using a Rockwell 65c02 cpu, which is CMOS, and a higher speed grade than the original NMOS based 6502, we can cheat and shorten the ϕ2 low, trading that time for a longer ϕ2 high pulse.

Just shy of 300khz

Just shy of 300khz

Using my trusty Bitscope Micro, I can probe the ϕ2 clock. You can see the asymetry between the high and low phases. The high phase is currently 2.8μs, or around 45 cycles for the Arduino. This equates to a clock speed of just under 300khz, which is very usable.

Demo time

Here is a short video showing the mega6502 running a short BASIC program in debug mode.

Here is a screen capture showing David Schmenk’s 30th birthday demo for the Apple 1.

Next steps

  • More tweaking of the decode logic to try to reduce the ϕ2 high period.
  • Implement a faux cassette interface possibly using the SD card for cassette storage
  • A new design using an Atmega1284P — a minimalistic two chip SBC 6502 solution, assuming I can find a bootloader that works.

Resources

If you liked this project, check out some other fantastic 6502 projects.

  • Project:65
  • Quinn Dunki’s fantastic VeronicaWe are not worthy!
  • PDA6502, Paul has designed his own 6502 solution from scratch.

Inspecting errors

The common contract for functions which return a value of the interface type error, is the caller should not presume anything about the state of the other values returned from that call without first checking the error.

In the majority of cases, error values returned from functions should be opaque to the caller. That is to say, a test that error is nil indicates if the call succeeded or failed, and that’s all there is to it.

A small number of cases, generally revolving around interactions with the world outside your process, like network activity, require that the caller investigate the nature of the error to decide if it is reasonable to retry the operation.

A common request for package authors is to return errors of a known public type, so the caller can type assert and inspect them. I believe this practice leads to a number of undesirable outcomes:

  • Public error types increase the surface area of the package’s API.
  • New implementations must only return types specified in the interface’s declaration, even if they are a poor fit.
  • The error type cannot be changed or deprecated after introduction without breaking compatibility, making for a brittle API.

Callers should feel no more comfortable asserting an error is a particular type than they would be asserting the string returned from Error() matches a particular pattern.

Instead I present a suggestion that permits package authors and consumers to communicate about their intention, without having to overly couple their implementation to the caller.

Assert errors for behaviour, not type

Don’t assert an error value is a specific type, but rather assert that the value implements a particular behaviour.

This suggestion fits the has a nature of Go’s implicit interfaces, rather than the is a [subtype of] nature of inheritance based languages. Consider this example:

func isTimeout(err error) bool {
        type timeout interface {
                Timeout() bool
        }
        te, ok := err.(timeout)
        return ok && te.Timeout()
}

The caller can use isTimeout() to determine if the error is related to a timeout, via its implementation of the timeout interface, and then confirm if the error was timeout related — all without knowing anything about the type, or the original source of the error value.

Gift wrapping errors, usually by libraries that annotate the error path, is enabled by this method; providing that the wrapped error types also implement the interfaces of the error they wrap.

This may seem like an insoluble problem, but in practice there are relatively few interface methods that are in common use, so Timeout() bool and Temporary() bool would cover a large set of the use cases.

In conclusion

Don’t assert errors for type, assert for behaviour.

For package authors, if your package generates errors of a temporary nature, ensure you return error types that implement the respective interface methods. If you wrap error values on the way out, ensure that your wrappers respect the interface(s) that the underlying error value implemented.

For package users, if you need to inspect an error, use interfaces to assert the behaviour you expect, not the error’s type. Don’t ask package authors for public error types; ask that they make their types conform to common interfaces by supplying Timeout() or Temporary() methods as appropriate.

Friday pop quiz: the size of things

In this program, the size of variables of type x and y in memory varies by platform.

package main

func main() {
        const n = 4
        type x [n]uint
        type y [n]int
}

By changing only one line can you ensure that variables of type x, and y always consume 16 bytes on all platforms that Go 1.4 supports ?

Rules

The code must continue to be correctly formatted.

Bonus points will be awarded for the most creative solution.

Points will be deducted for arguing with the judge (me).


Answers

The solution obviously involved setting n to 4 on 32 bit platforms, and 2 on 64 bit. There were a wide number of variations on this, involving a menagerie of subtraction, shifting and multiplication. The solution I came up with used only one operator:

const n = 4 >> (^uint(0) >> 63)

^uint(0) gives you a number whose bits are all 1, then >> 63 shifts the number 63 binary places to the right. If we’re on a 64 bit platform, this evaluates to 1, shifting 4 one place to the right leaves 2, otherwise 32 ones shifted 63 places to the right gives zero, and 4 shifted right zero times is still 4.

So I was feeling rather chuffed with myself until Paul Hankin quietly dropped this solution:

const n = ^uint(6) % 7

Paul, my hat is off to you Sir.

Minimum one liner followup

It’s a little unfair to announce winners in some kind of order as I did post the quiz at an unfriendly hour of the day for most of the planet.

With that said, Tim and William came up with a great map based solution at roughly the same time. You’ll have to split the winnings between yourselves.

Gary came an interesting solution that works for almost all the integers.

Gustavo Niemeyer takes double points for demonstrating that the first version of this problem could be defeated easily, and then proceeded to demonstrate his very mathy solution to fix Gary’s proposal. Several others also proposed some great shift tricks.

Honourable mentions go to Charlie Somerville, for playing the man and not the ball and Francesc who proved that even with two attempts I couldn’t make the problem sufficiently water tight.

Although the prohibition on adding more than one line was lost on Brendan Tracey, I think this proposal deserves to be highlighted.

So with sensible, workable, and sometimes beautiful solutions out in the open, the race was on for the bonus points for the most creative.

The first was my entry, which was the genesis for this quiz and goes to show, this why we cannot have nice things.

func f(a int, b uint) {
        var min = 0
        min = copy(make([]struct{}, a), make([]struct{}, b))
        fmt.Printf("The min of %d and %d is %d\n", a, b, min)
}

Props for figuring this out goes to Arnaud Porterie and Gustavo Niemeyer who were both good sports and deleted their answer.

I was feeling rather pleased with myself until Paul Hankin emailed me this fabulously creative effort. After that others tweaked to the loop hole that I had inadvertently left open by importing the fmt package.

Congratulations to the winners, and thank you all for contributing.

Friday pop quiz: minimum one liner

This program is incorrect

package main

import "fmt"

func f(a, b int) {
        var min = 0
        fmt.Printf("The min of %d and %d is %d\n", a, b, min)
}

func main() {
        f(9000, 314)
}

By adding only one line can you make it print the correct answer ?

The code must continue to be correctly formatted.

Bonus points will be awarded for the most creative solution.

Points will be deducted for arguing with the judge (me).

Update: thanks to Gustavo Niemeyer who pointed out the first version of the quiz made it way to easy.

Update: a few people have provided some very sound, rational solutions. Good job, give yourself a code review gold star.

The bonus points for the most creative solution are still on the table. As a hint my solution will also work for this variant of the problem.


The answer(s) will be posted tomorrow.

Retrochallenge 2015/01 entry, reviving an Apple II motherboard

After lurking on the fringes of the hobbyist electronic and retrocomputing communities for a few years I’ve decided to take the plunge and join the RC2015/01 retrochallenge.

Apple II rev 7 motherboard circa '81

Apple II rev 7 motherboard circa ’81

The task I have assigned myself is to revive this 1981 vintage revision 7 Apple II motherboard which I discovered in a box of parts while visiting my family last week. I have a vague memory that I got this board and some other spare parts in the mid 90’s, but beyond that its origin is a mystery.

Off by one error

Off by one error

I have not tried to power up the board, but strongly suspect that it does not — if you look closely you can see that some wag has replaced the MOS 6502 with an Intersil 6402 UART! Astute readers will also note that not only are the ROMs out of order, but one is upside down.

This isn't the socket you are looking for

This isn’t the socket you are looking for

Clearly I’ll have my work cut out for me as I cannot assume anything on the board is working, or correct. There are also some minor repairs needed to the board (a transistor has snapped off, bent pins, covered in dirt, etc), but nothing that looks too scary.

So, in preparation for next January, it’s off to eBay to stockpile parts for test rigs and spares.

Five suggestions for setting up a Go project

The question of how to set up a new Go project appears commonly on the golang-nuts mailing list.

Normally the advice for how to structure Go code centres around “read the standard library”, but the standard library is not a great deal of use to newcomers in the respect as:

  • You don’t go get packages from the standard library, they’re always present as part of your Go installation
  • The standard library doesn’t live in your $GOPATH so its layout is less useful as an example.

This article attempts to illustrate common patterns for structuring Go projects using real life packages as examples.

Creating a package

A package is a directory inside your $GOPATH/src directory containing, amongst other things, .go source files.

The name of the package should match the name of the directory in which its source is located. If you package is called logger, then its source files may be located in

$GOPATH/src/github.com/yourname/logger

Package names should be all lower case. Sorry, it’s 2014, and there are still operating systems that can’t cope with mixed case.

Package names, and thus the package’s directory, should contain only letters, numbers if you must, but absolutely no punctuation.

The name of a package is part of the name of every type, constant, variable, or function, exported by that package. It may look odd when inside the package, but always consider what it looks like the caller.

Avoid repetition. bytes.Buffer not bytes.BytesBuffer, strings.Reader not strings.StringReader, etc.

For more advice on naming, see Andrew Gerrand’s excellent talk on Go naming.

All the files in a package’s directory must have the same package declaration, with one exception.

For testing, your test files, those ending with _test.go, may declare themselves to be in the same package, but with _test appended to the package declaration. This is known as an external test. For now, just accept that you can’t put the code for multiple packages into one directory.

Main packages

Some packages are actually commands, these carry the declaration package main.

Main packages deviate from the previous statement about the package declaration and the packages’ directory being the same. In the case of commands, the name of the command is taken from the name of the package’s directory.

This obviates the need to use flags like -o when building or installing Go programs — the name of the command is automatically inferred from the name of the directory containing the program.

Everything in Go works with packages.

The go commands; go build, go install, go test, go get, all work with packages, not individual files.

go run is the exception to this rule. It is intended only to be a local version of the go playground. Avoid using it for anything more trivial than a program you would otherwise run in the playground.

The import path

All packages exist inside a directory tree rooted at $GOPATH/src. Because of this, a package’s import path and a package’s name are often different.

Don’t confuse this with the previous statement that a package’s name, its package declaration, should match the directory in which the package’s files live.

The import path is effectively the full path to your package. It is what differentiates your logger package from the dozens of others that are also named logger.

Note: There is no concept of sub packages in Go. This is why the ioutil package is called ioutil, not util with an import path of io/util. This avoids local namespace collisions.

VCS names in import paths

In other languages it is quite common to ensure your package has a unique namespace by prefixing it with your company name, say com.sun.misc.Unsafe. If everyone only writes packages corresponding to domains that they control, then there is little possibility of a collision.

In Go, the convention is to include the location of the source code in the package’s import path, ie

$GOPATH/src/github.com/golang/glog

However there are several important points to remember:

  1. This is not required by the language, it is just a feature of go get.
    go get recognises paths that start with known code hosting sites, Github, Bitbucket, Google code, and knows how to convert the import path of the package (not the name) into the correct command to check out the code.
  2. By following this convention you can point go get at some source code you have in your $GOPATH and it will recursively fetch any required packages. You can even have it fetch all the source code by calling go get import/path.
    This has turned out to be a very simple way of distributing Go programs.
  3. This does not mean that you need to be online to use the Go compiler, or that you need to have made your project public. Remember, the naming of packages is only an aide to go get, and go get is an optional command.

Sample repositories

With this background in place, I’m going to walk through some examples of the various types, or styles, of Go projects. Hopefully by studying them you will understand how to structure your projects in a way that interoperates well with others.

A single package

The simplest example of a Go project is a repository that contains only one package. The example I have chosen is Keith Rarick’s fs package, https://github.com/kr/fs.

This is the simplest Go project, a single package with the code at the root of the repository. The import path for this project would be

import "github.com/kr/fs"

Multiple packages

The next logical step after creating a repository containing a single package is a more complicated project with multiple packages in a single repository.

I’ve chosen my own term project, https://github.com/pkg/term, which contains two packges, github.com/pkg/term, and github.com/pkg/term/termios, containing syscalls to handle the various termios(3) syscalls.

Even though Go does not have a notion of sub packages, term and term/termios live in the same repository. I could have created two projects, https://github.com/pkg/term and https://github.com/pkg/termios, but as they are closely related, it made sense to place the source for both packages in the same Github repository.

To use this project, you would import it with

import "github.com/pkg/term"

A command

godep, https://github.com/tools/godep, is an example of a repository containing one command package at its root.

Because the source for this package declares it to be in package main when compiled the program will appear as $GOPATH/bin/godep.

% go get -v github.com/tools/godep
github.com/tools/godep (download)
github.com/kr/fs
golang.org/x/tools/go/vcs
github.com/tools/godep

A command and a package

The fourth example shows how to structure a Go project that includes shared logic in a package, and a command which uses that logic. The project I have chosen is the platinum searcher by Monochromegane, https://github.com/monochromegane/the_platinum_searcher, an excellent replacement for ack or ag written in pure Go.

At the root of the project is the the_platinum_searcher package (this does break the prohibition on punctuation in package names) containing the logic. In the cmd/pt subdirectory is the main package. Using the globbing feature of go get installing pt is simply

% go get -u github.com/monochromegane/the_platinum_searcher/...

This is not the only way to lay out this style of package. Other examples may place the command, package main, at the root of the repository and the packages containing the logic of the project in a subdirectory. An example of this is Steve Francia’s Hugo, https://github.com/spf13/hugo.

In both examples the intention is to keep as much logic out of the command, as commands cannot be imported by other packages, limiting the reuse of code inside main packages.

Multiple commands and multiple packages

The final example, the go.tools subrepo, https://code.google.com/p/go/source/browse/?repo=tools, combines all of the above.

The tools repo contains many Go packages, and a burgeoning cmd subdirectory of Go programs. As a resource of well written, contemporary, Go code, you could do far worse.

Further reading