Monthly Archives: August 2014

Go has both make and new functions, what gives ?

This is a post about Go’s built in make and new functions.

As Rob Pike noted at Gophercon this year, Go has many ways of initialising variables. Among them is the ability to take the address of a struct literal which leads to serveral ways to do the same thing.

s := &SomeStruct{}
v := SomeStruct{}
s := &v              // identical
s := new(SomeStruct) // also identical

It is fair that commenters point out this redundancy in the language and this sometimes leads them to search for other inconsistencies, most notably the redundancy between make and new.

On the surface it appears that make and new do very similar things, so what is the rationale for having both ?

Why can’t we use make for everything ?

Go does not have user defined generic types, but it does have several built in types that can operate as generic lists, maps, sets, and queues;  slices, maps and channels.

Because make is designed to create these three built in generic types, it must be provided by the runtime as there is no way to express the function signature of make directly in Go.

Although make creates generic slice, map, and channel values, they are still just regular values; make does not return pointer values.

If new was removed in favour make, how would you construct a pointer to an initialised value ?

var x1 *int
var x2 = new(int)

x1 and x2 have the same type, *intx2 points to initialised memory and may be safely dereferenced, the same is not true for x1.

Why can’t we use new for everything ?

Although the use of new is rare, its behaviour is well specified.

new(T) always returns a *T pointing to an initialised T. As Go doesn’t have constructors, the value will be initialised to T‘s zero value.

Using new to construct a pointer to a slice, map, or channel zero value works today and is consistent with the behaviour of new.

s := new([]string)
fmt.Println(len(*s))  // 0
fmt.Println(*s == nil) // true

m := new(map[string]int)
fmt.Println(m == nil) // false
fmt.Println(*m == nil) // true

c := new(chan int)
fmt.Println(c == nil) // false
fmt.Println(*c == nil) // true

Sure, but these are just rules, we can change them, right ?

For the confusion they may cause, make and new are consistent; make only makes slices, maps, and channels, new only returns pointers to initialised memory.

Yes, new could be extended to operate like make for slices, maps and channels, but that would introduce its own inconsistencies.

  1. new would have special behaviour if the type passed to new was a slice, map or channel. This is a rule that every Go programmer would have to remember.
  2. For slices and channels, new would have to become variadic, taking a possible length, buffer size, or capacity, as required. Again more special cases to have to remember, whereas before new took exactly one argument, the type.
  3. new always returns a *T for the T passed to it. That would mean code like
    func Read(buf []byte) []byte
    // assume new takes an optional length
    buf := Read(new([]byte, 4096))

    would no longer be possible, requiring more special cases in the grammar to permit *new([]byte, length).

In summary

make and new do different things.

If you are coming from another language, especially one that uses constructors, it may appear that new should be all you need, but Go is not those languages, nor does it have constructors.

My advice is to use new sparingly, there are almost always easier or cleaner ways to write your program without it.

As a code reviewer, the use of new, like the use of named return arguments, is a signal that the code is trying to do something clever and I need to pay special attention. It may be that code really is clever, but more than likely, it can be rewritten to be clearer and more idiomatic.
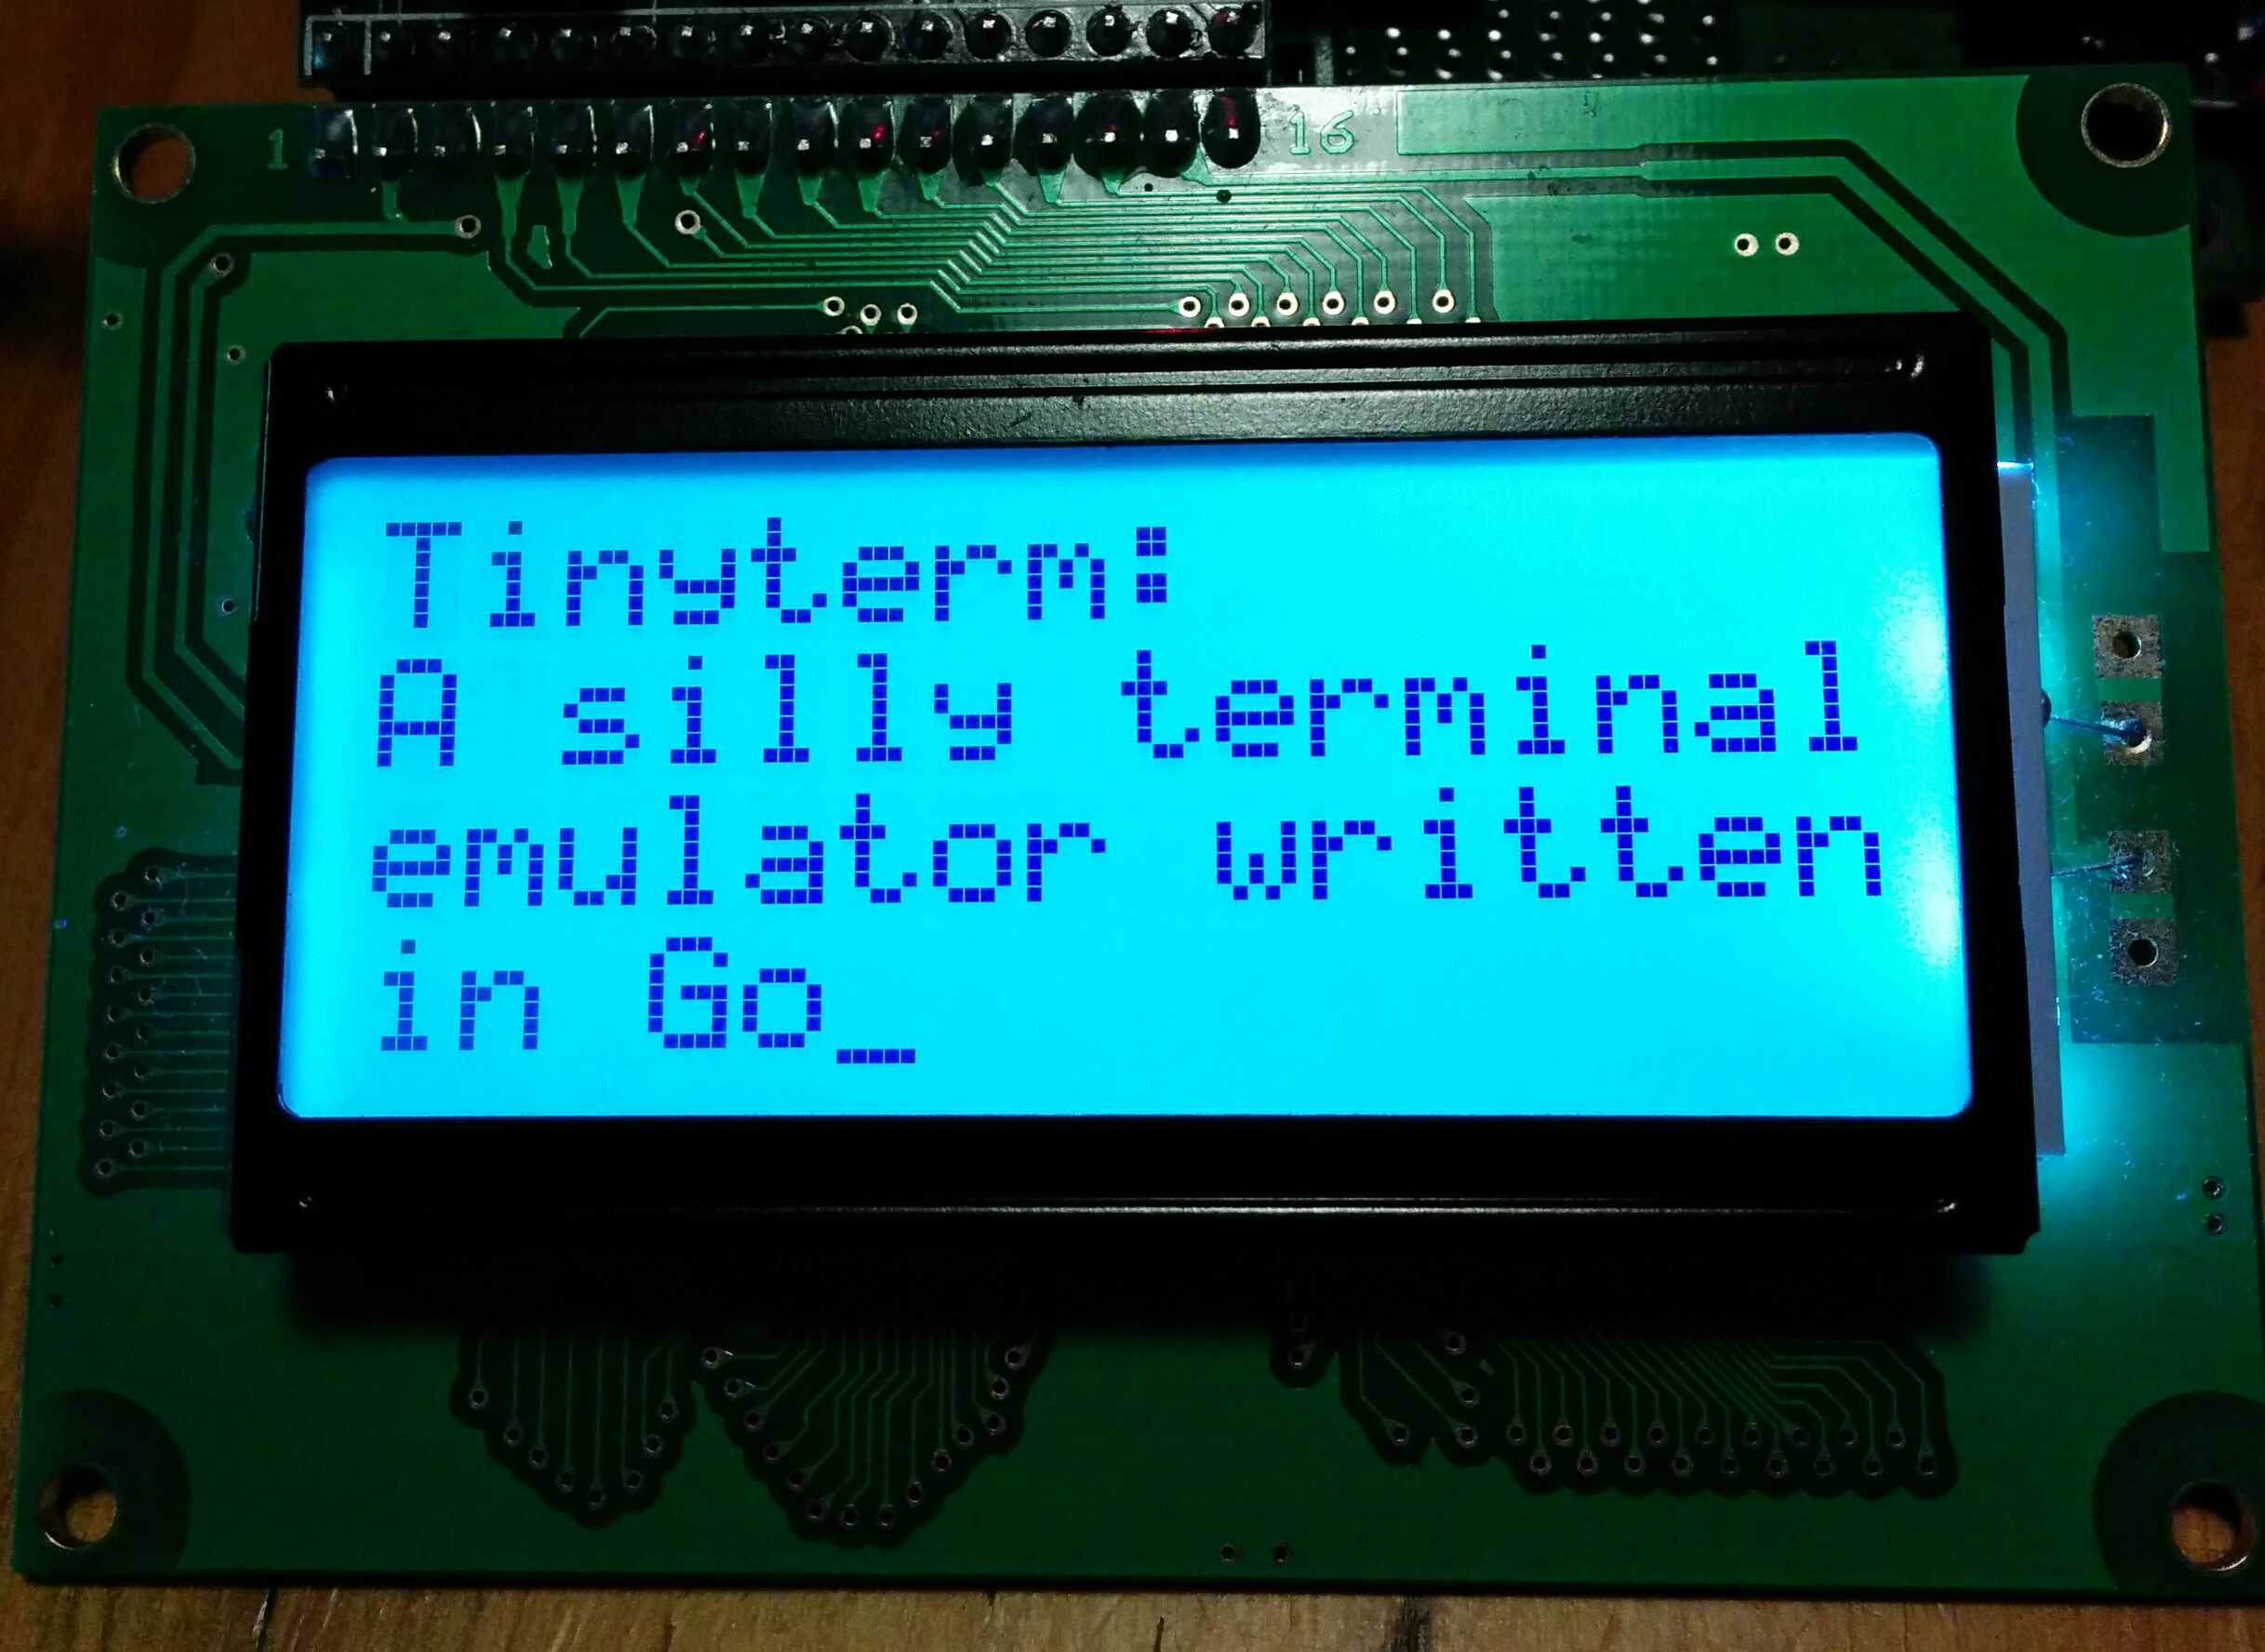
Tinyterm: A silly terminal emulator written in Go

Tinyterm
This post is about Tinyterm, a silly hack that I presented as a lightning talk at last month’s Sydney Go User group 1. You can find the original slides online at talks.golang.org.


Screenshot from 2014-08-03 14:22:43

This talk is about a experiment to see if I could drive I2C devices from Go through my laptop’s VGA port. It was inspired by a recent post on Hack-a-Day.

Screenshot from 2014-08-03 14:23:26

There are several parts to this presentation. There is some Go in here, trusty me.

Screenshot from 2014-08-03 14:24:03

The first piece of the puzzle is the I2C bus.

The I2C bus is a low speed two wire serial bus mainly used for connecting sensors and microcontrollers together.

But, you don’t even need a microcontroller to use I2C. If you’re patient you can bit bang the protocol using a few resistors and tack switches.

Screenshot from 2014-08-03 14:24:42

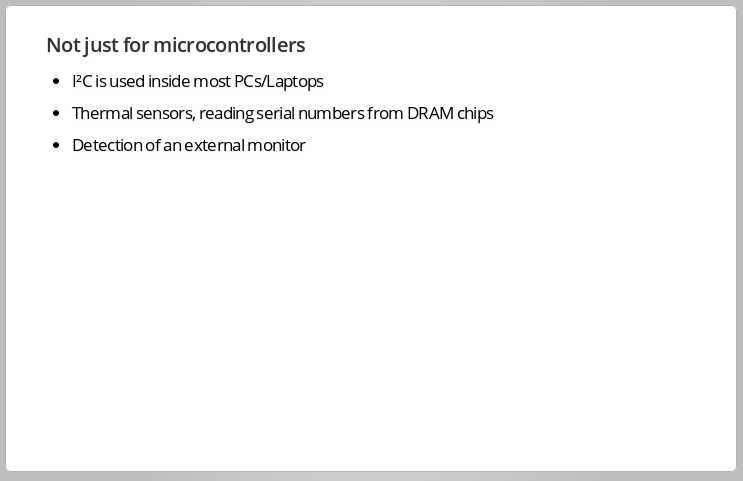
I2C isn’t just used on microcontrollers like the Arduino. It’s has been used inside every PC and laptop for decades as a slow speed serial protocol for interfacing with simple devices like temperature sensors.

If you’ve used the lmsensors package in Linux, or have heard of SMBus, this is basically a variant of I2C.

Importantly, I2C is also used as the protocol to detect an external monitor, where it goes under the name DDC2b.

ddc

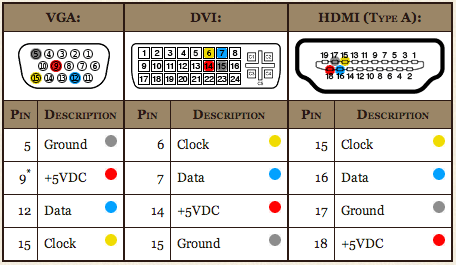
i2C pins are available on VGA, DVI and HDMI connectors. Source http://www.paintyourdragon.com/?p=43

Screenshot from 2014-08-03 13:37:06

Talking to I2C devices is as simple as installing a kernel module which will create devices entries in your /dev/ directory.

% ls /dev/i2c*
/dev/i2c-0  /dev/i2c-1  /dev/i2c-2  /dev/i2c-3  /dev/i2c-4 
/dev/i2c-5  /dev/i2c-6  /dev/i2c-7  /dev/i2c-8

Screenshot from 2014-08-03 13:39:18

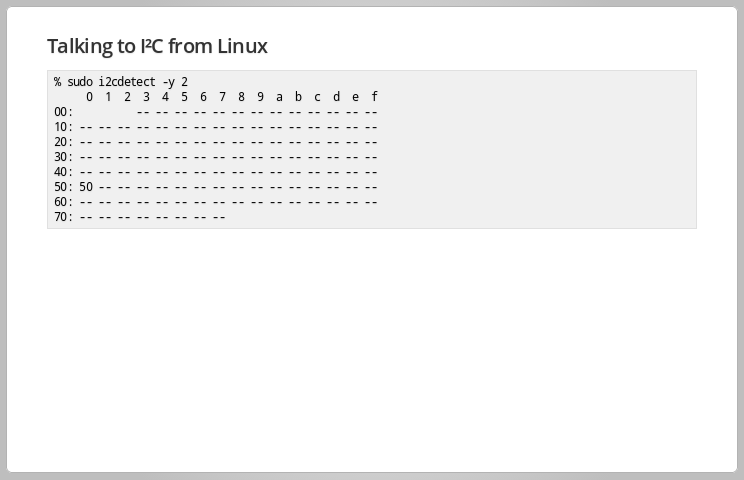
Each device on the I2C bus has a unique address. You can use the i2cdetect command (part of the i2c-utils package on Ubuntu) to scan the bus.

In this example, the device responding at 0x50 is my laptop’s internal LCD screen. That device is an EEPROM which holds specifications of the screen.

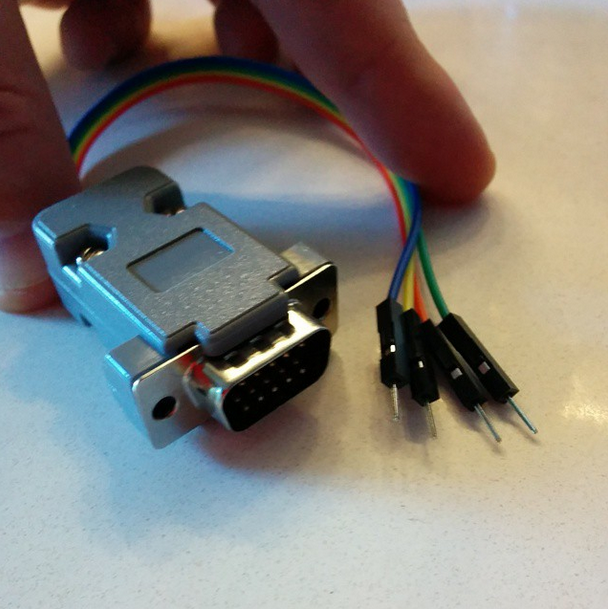
After a bit of reverse engineering of the hack a day post, and a quick trip to Jaycar for parts I came up with this simple adapter

i2c adapter mark I

I2C adapter mark I

The adapter just breaks out pins 5, 9, 12, and 15 to the Dupont patch cables. Using a logic analyser I verified that pins 12 and 15 looked like I2C data when I ran i2cdetect.

i2c adapter talking to an i2c io expander

I2C adapter talking to an I2C IO expander

The next step was to connect up a real I2C device to the bus and see if I could detect it with i2cdetect.

Although both the LCD and the laptop are 5 volt devices I wasn’t sure how much current the laptop could source on pin 9, so I opted to buffer the devices using a Freetronics level shifter which effectively isolates the laptop from the high current LED backlight on the LCD panel.

Screenshot from 2014-08-03 13:56:10

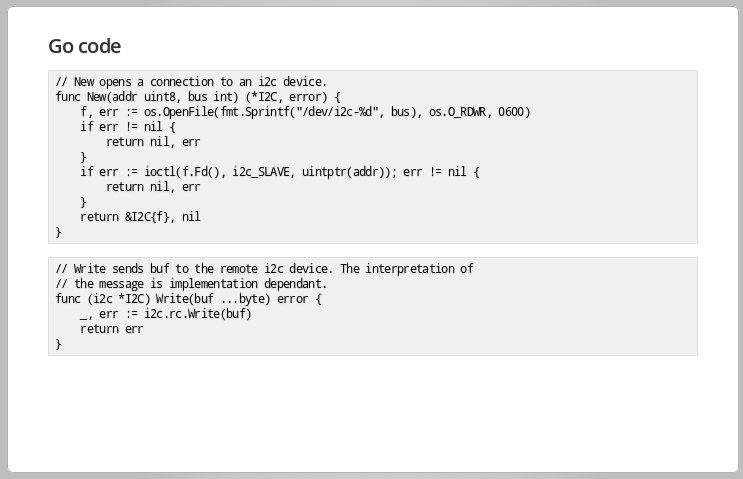
Now the hardware was done, it was time to write some code. Driving an I2C device from userspace in Go is pretty straight forward; open the device, then use an ioctl to tell the kernel to bind the file descriptor to a remote I2C device.

Screenshot from 2014-08-03 13:58:55

The LCD I was using is based on the Hitachi HD44780 standard which has a baroque protocol using many pins and is completely incompatible with I2C.

To interface between the HD44780 I’m using a cheap PCF8574 I2C IO expander which takes any byte received over I2C and maps it directly to its output pins.

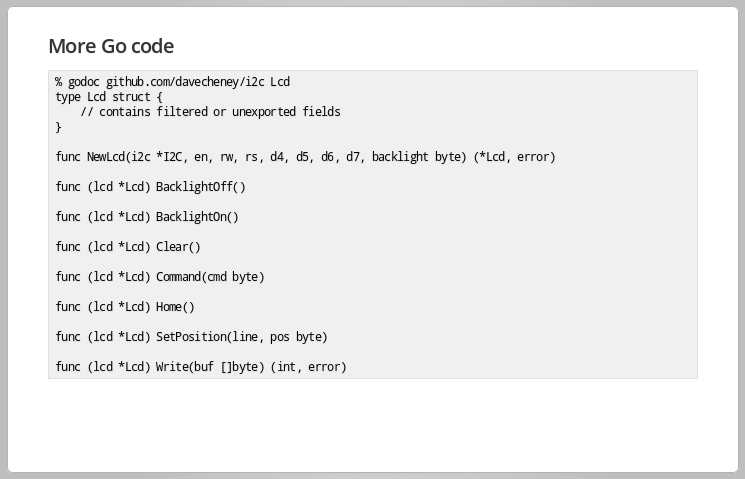
I adapted some Python code to work with my Go I2C type which gave me a set of LCD primitives to work with.

Screenshot from 2014-08-03 14:04:51

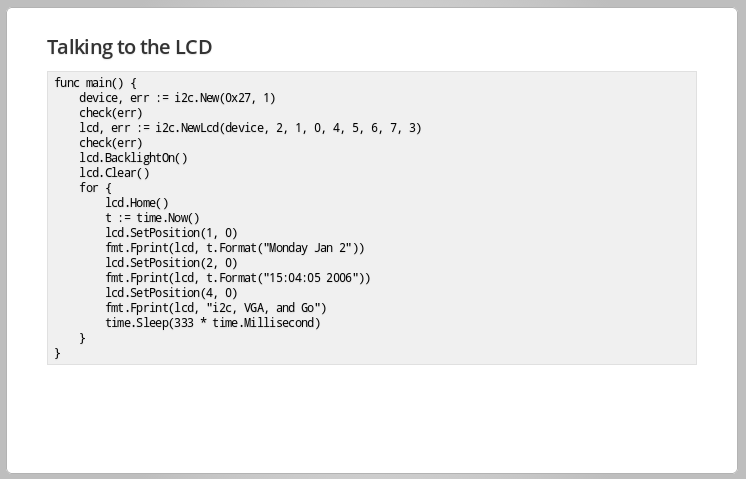
So now I can drive the output of the LCD with Go. Here is an example

helloworld.go

helloworld.go

Screenshot from 2014-08-03 14:07:20

But this was kind of boring, could I do something more interesting ?

Looking back through this project it occurred to me that the recurring theme was, in the best UNIX tradition, everything is a file.

  • I2C buses are visible in userspace as files
  • Each I2C device is a file descriptor, once opened and programmed by ioctl
  • UNIX processes talk to each other over file descriptors
  • In Go, that is basically an io.Writer, right ?

So, could I connect a UNIX process’s output to the LCD screen transparently ?

Screenshot from 2014-08-03 14:11:28

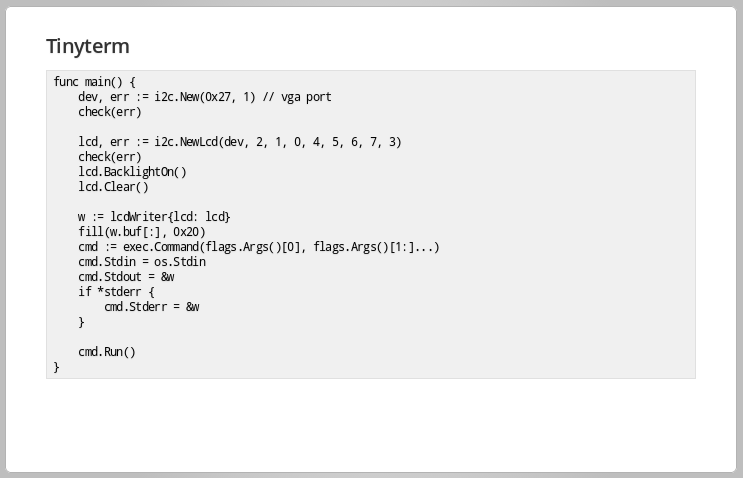
Enter Tinyterm, a simple Go program that does just that.

Using an lcdWriter type (more on that in the next slide), Tinyterm spawns a child process and redirects Stdout and Stderr to the LCD.

Screenshot from 2014-08-03 14:15:43

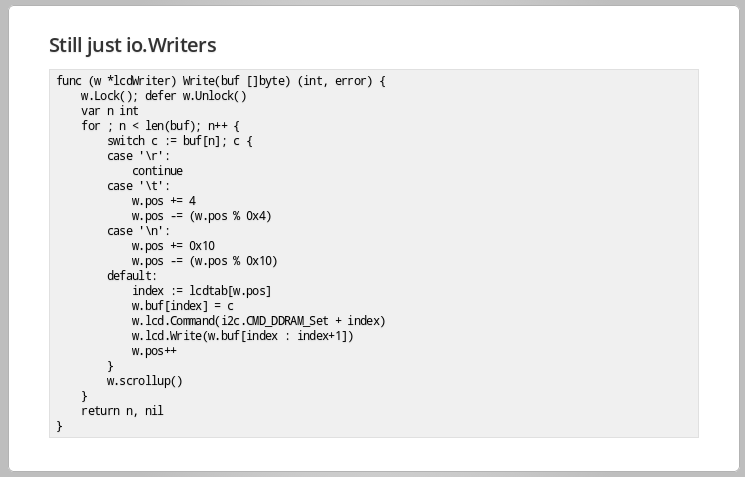
The lcdWriter‘s Write method has a little bit of smarts to deal with making the LCD look like a 16 x 4 terminal, rather than a linear stream of characters, handles scrolling the screen, and obscures the odd addressing scheme of the video memory inside the HD44780.

Screenshot from 2014-08-03 14:17:37

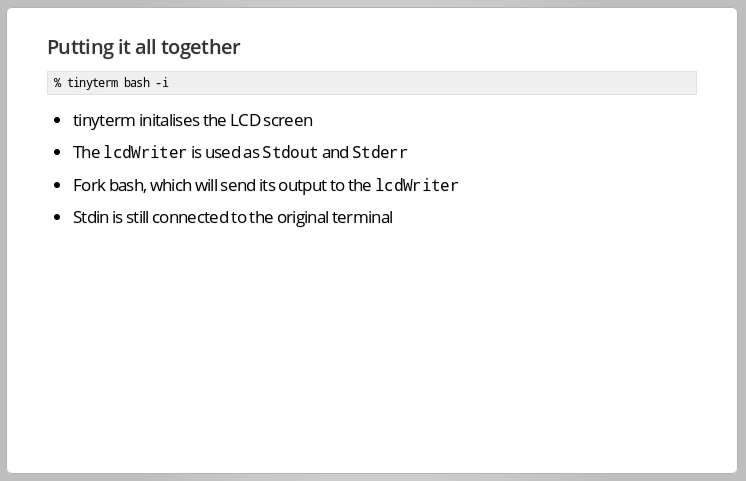
Putting it all together we have the tinyterm command, which runs its arguments as a subprocess, sending the child’s stdout and stderr to the LCD. Stdin is not redirected, so it takes input from the original terminal device, eventually mapping back to my keyboard.

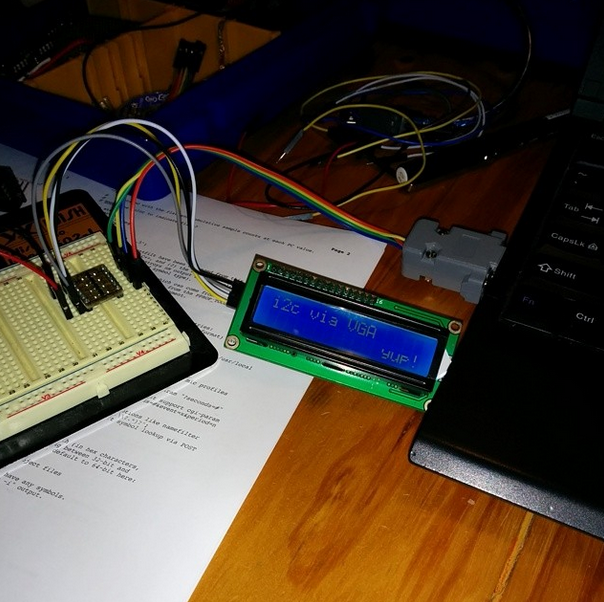
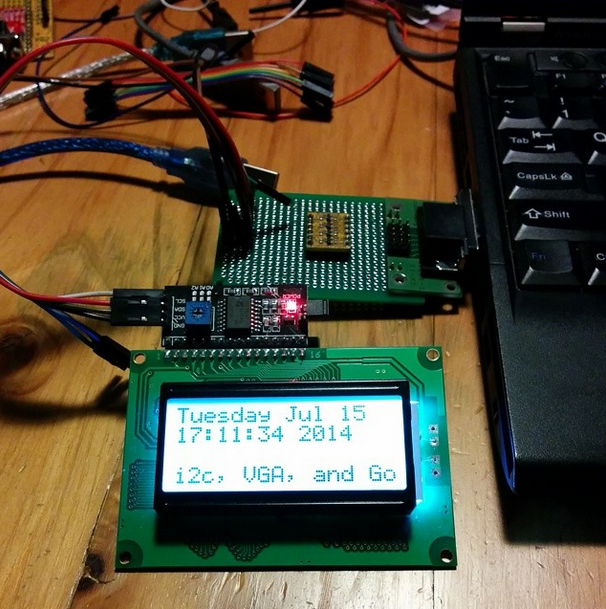
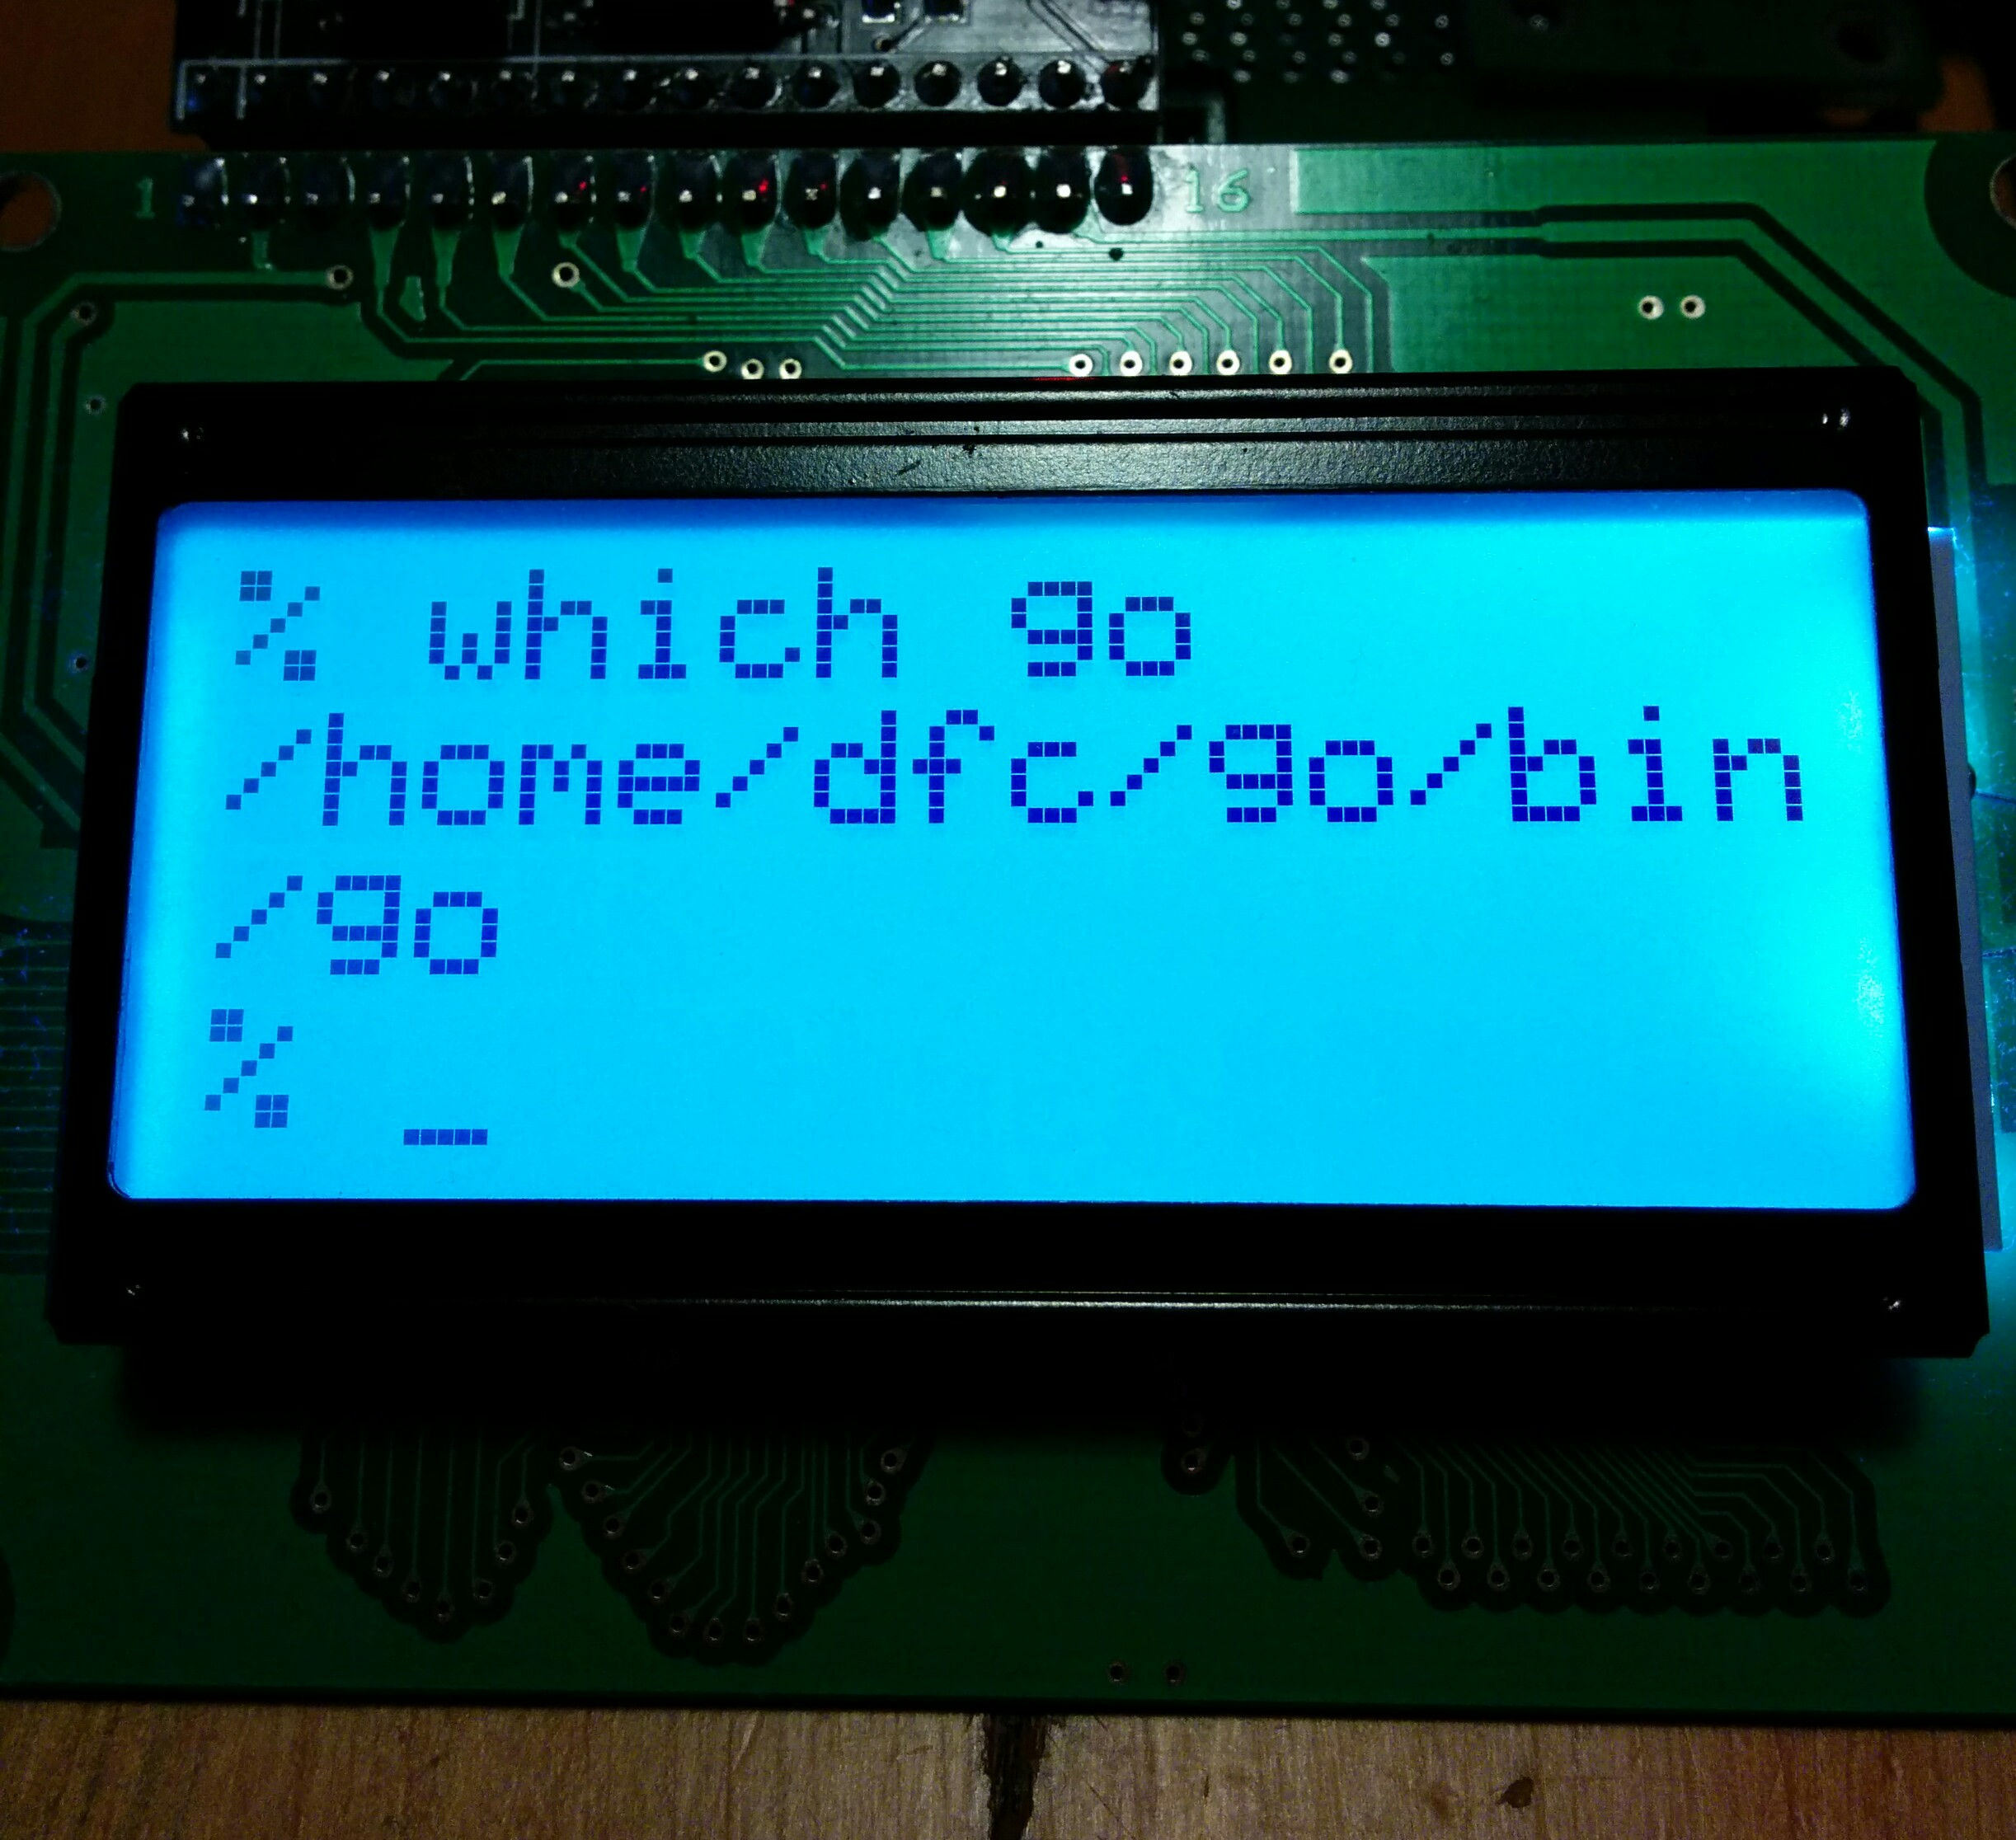
Tinyterm example, hopefully a video will be available soon.

Tinyterm example, hopefully a video will be available soon.

Screenshot from 2014-08-03 14:20:00

The code for the i2c and lcd types is on github, github.com/davecheney/i2c, along with the helloworld and tinyterm example programs.


1 The talk was recorded but it is not clear if the recording worked, I will update this post if/when the video is available.