This project was featured on Hackaday and the Atmel blog.
For the next step in my Apple 1 replica project I decided I wanted to replace the Arduino Mega board with a bare Atmega MPU with the goal of producing a two chip solution — just the Atmel and the 6502, no glue logic or external support chips.
I had been stockpiling parts for this phase of the project for a while now, so I sat down to lay out the board based on a small 5×7 cm perfboard.

Perfboard sketch
The trickiest piece was fitting the crystal and load capacitors into the design without disrupting to many of the other traces. It worked out well so I decided to add ICSP and FTDI headers and tried my hand at laying out the board using Fritzing.
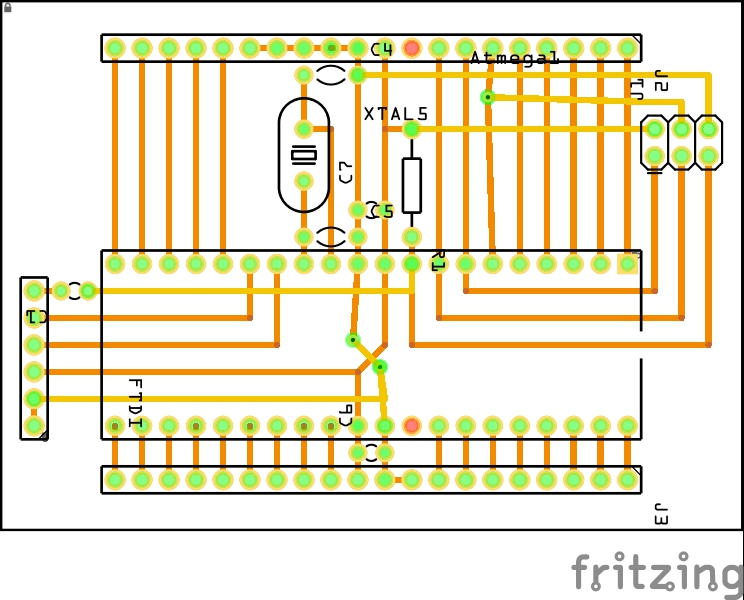
Fritzing layout
The picture above is one of several designs I tried in Fritzing. I designed another that uses a flood fill ground plane to eliminate all the vias. We’ll see how that one turns out in a few weeks.
Rant: Cadsoft Eagle might be the industry standard, at least amongst open source hardware hackers, but it truly embodies the “worse is better” philosophy. Maybe one day my Altium Circuitmaker invitation will arrive (hint hint).
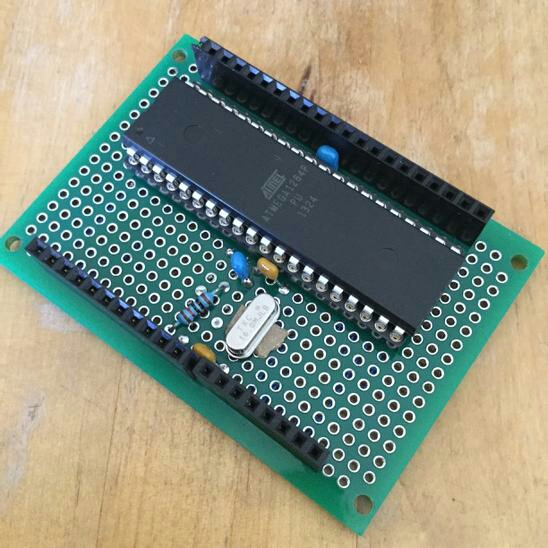
The finished product
While I’m waiting for my PCBs to be delivered I decided to build a simplified version. The FTDI and ISCP headers have been left off as they are readily accessible from the headers on the left hand side.
Demo time
It worked, first time.
Bootloaders
The atmega1284p’s I ordered were unprogrammed. Getting Optiboot installed on them is handled nicely by Manicbug’s Mighty1284 Arduino support package. There are only two small issues of note.
- Due to cross talk between the XTAL1 and RX0 pins, serial communication may be unreliable. The solution to this is configure the clock source to use Full Swing mode (rather than the default low power mode). This is done by setting the relevant fuse settings in
boards.txtlike somighty_opt.bootloader.low_fuses=0xf7
- Mighty1284 only supports Arduino 1.0.x, not the newer 1.5.x betas. This might be an issue if you are a fan of the improvements in Ardunio 1.5.x as it doesn’t look like Mighty1284 is being updated.
Next steps
I’m smitten with the 1284p. It feels like the right compromise between the pin starved 328 and the unfriendly 2540 series. The 1284p supports more SRAM than either of its counterparts and ships in a package large enough that you get a full 24 pins of IO.
This experiment gave me the skills and the confidence to continue to design my replica project around the 1284p. I had originally intended to build the replica in two boards, possibly adding a third with some SRAM. Routing the upper 6502 board will be harder than the lower 1284p board, so I may have to wait til my Fritzing samples return to judge the feasibility of that approach.
Dave,
I updated the Goldilocks 1284p support to the Arduino BETA 1.5.8 IDE recently. In hindsight, It is just a matter of getting the config files right.
You can find a bootloader that will work for you there.
http://feilipu.me/2013/03/08/goldilocks-1284p-arduino-uno-clone/ check for the 20150101 zip file.
You’ll just need to adjust the F_CPU in the bootloader to what you’ve chosen to build.
There is enough space in the 1284p to include a boot monitor, which can help debugging hardware, etc.
Phillip