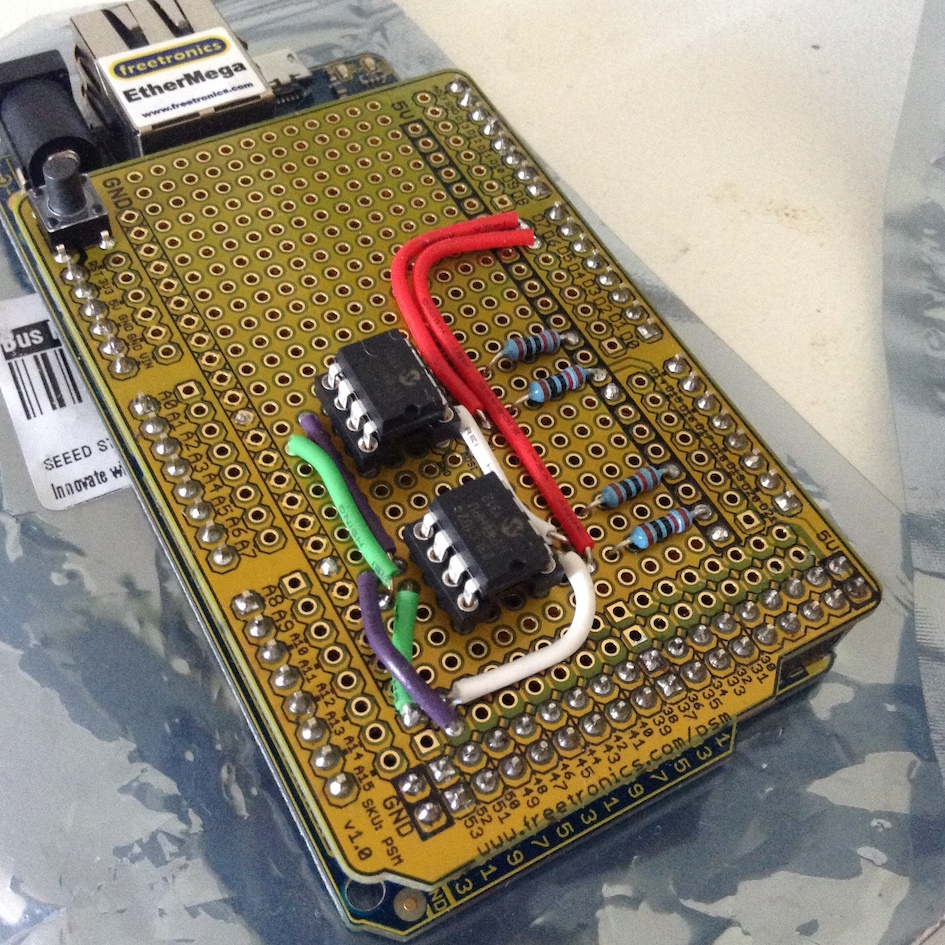
SPI SRAM shield mounted on an Freetronics Ethermega
In my previous post I had figured out that I could capture memory accesses in my simulator and send them elsewhere.
In version 1 of the design I (ab)used the onboard mini SD card to simulate the entire address space. This was a very 1950’s solution and came with matching performance.
Still, it did give me confidence that this project was possible and so I located a kit which would give me a better performing memory subsystem. I duly ordered the kit from Colin Irwin but didn’t know how long it would take to get here from France.
Trolling around eBay I had found various EEPROM solutions like this one which I thought I could adapt. The board wasn’t directly usable as it was configured for 2 wire I2C, not 3 wire SPI, but it suggested to me that I could build a shield to hold some SRAM chips to get my project going while I waited for the XRam shield to arrive.
There is a common SRAM chip, the Microchip 23K256, which is a 32 kilobyte chip with an SPI interface. I’ve seen it used in various PIC designs, and is an option on the Propeller PMC.
The 23K256 isn’t as common in Arduino designs because of one major flaw; it’s a 3v3 part. This would mean adding a level converter to the shield and being careful not to drop 5 volts across any of the pins on the chip.
There was also the problem of capacity. To get to 256 kilobytes I would need 8 chips on the same SPI bus, and a logic level converter, not counting the onboard SPI devices like the micro SD card and the Wiznet ethernet chip that come with the Ethermega. This was likely to get more complicated than I was planning on, so I continued to look for an alternative SRAM part.
Version 2, the 23LC1024
Luckily I didn’t have to look very far. The Microchip 23LC1024 has 4 times the capacity, and can operate at 5 volts. This meant I would only need two chips to get 256kb and would only need to dedicate two pins to driving the Chip Select lines on the SRAM ICs.
As I live in Australia, there is a difference between choosing the part you want, and actually being able to buy it. While most of the Microchip stock appeared to be in the UK, I found the last two chips in stock at a Element 14, and ordered them straight away. Spares? Pfft, those are for people with no self confidence.
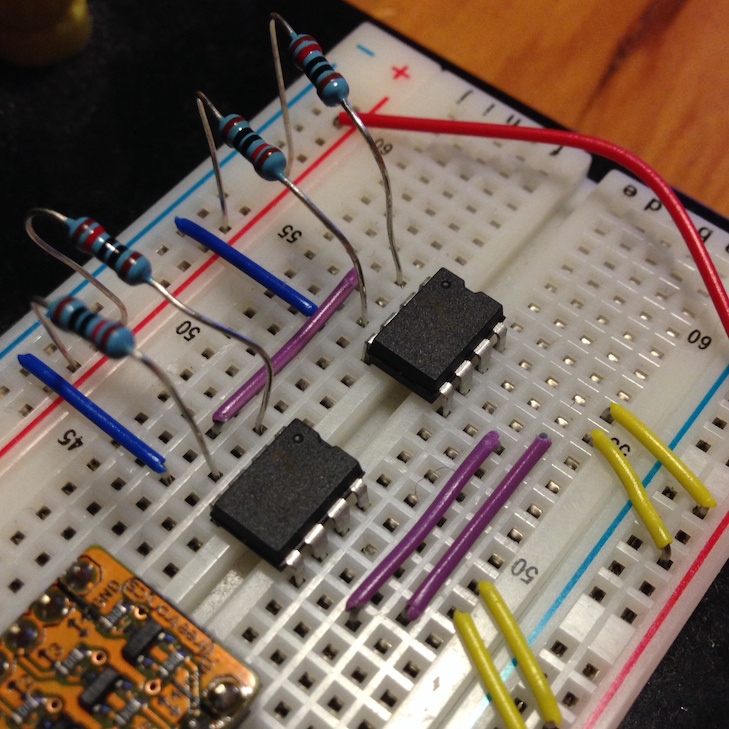
wow. such unstable. so noise. very breadboard
Spelunking on the Arduino forums had yielded some war stories and a nice SpiSRAM library to interface with the chips. It also came with a small ram test sketch.
My first attempts to integrate the 23LC1024s on the breadboard wasn’t very successful. Even though I follow the application note I wasn’t able to get the chips to reliably pass the SRAM test. Sometimes the data would be written perfectly, other times it would just be garbage.
By default the 16Mhz Atmel parts drive the SPI pins at 4Mhz. From reading other blogs it was clear that this sort of frequency is outside what the breadboard is designed for, not to mention the large patch leads between the Ethermega and the breadboard.
Increasing the SPI divider to slow down the transactions sort of worked, but it was clear I wouldn’t be able to hook the SRAM up to the avr11 in this condition so I’d need to build a proper shield to hold the ICs.
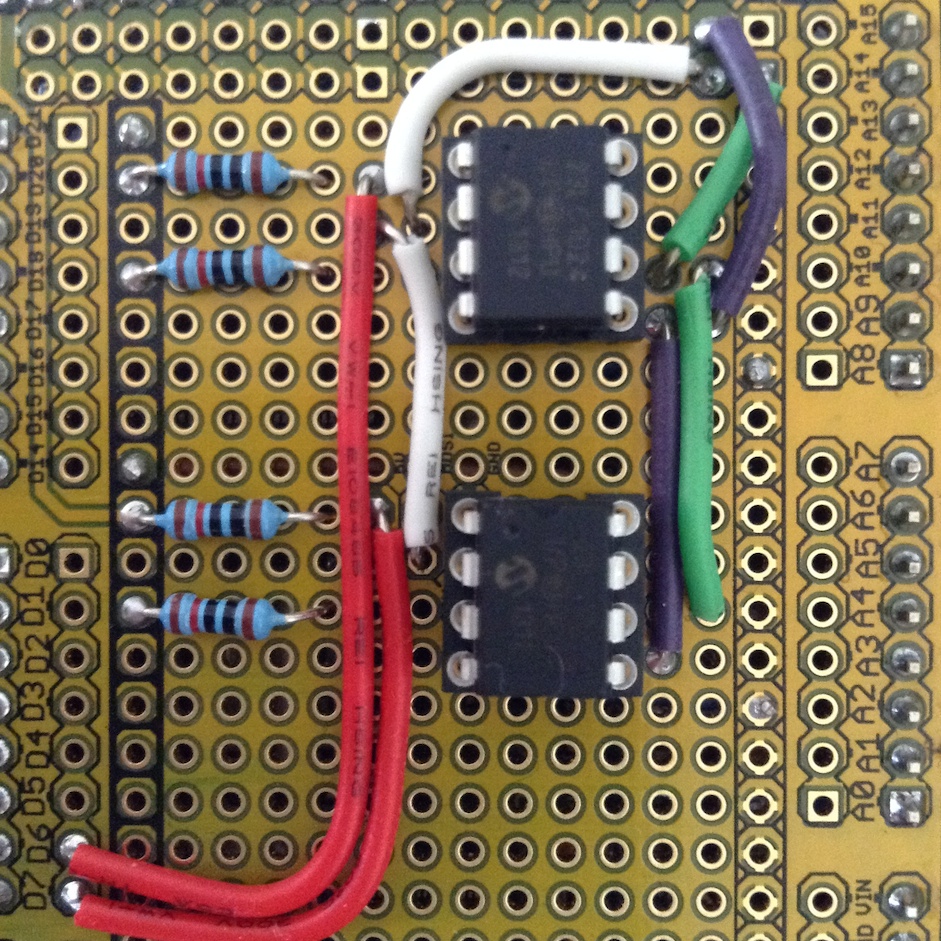
Closeup of the shield. No, you may not see the under-side.
A few days and another trip to Jaycar later, I had all the parts I needed. A few hours bodging at the local hacker space and I had reproduced my design onto a prototyping shield allocating pins D6 and D7 as the chip select pins.
I took the shield home, plugged in the chips and both banks worked first time! Getting cocky I loaded the avr11 sketch and discovered that the micro SD card had failed to initialise, WTF! Reloading the sketch, the SD card worked fine, but the SRAM test showed garbage.
The source of the problem turned out to be the default state of the digital pins on the Arduino. The way SPI works is all the components on the SPI bus share three lines, MISO (master in, slave out), MOSI (master out, slave in), and SCLK (a clock line driven by the master). Additionally every device has its own Chip Select line which must be held high to inhibit the device unless you want to talk to it.
To talk to an individual device, you lower the CS line connected to that chip and read and write data on MOSI/MISO, toggling the SCLK line. All the other devices which have their CS lines high are supposed to hold their MISO and MOSI at a high impedance and ignore transactions on the bus.
The problem is, when the Arduino resets, all the digital lines are set to input and are low; you don’t want an Arduino with no sketch loaded suddenly sending 5volts out of every digital pin. In effect all the Chip Select lines could be active, meaning all the components are listening to the transaction and trying to interact with the master.
The solution I came up with was to ensure that all the digital pins are set to output and held high before calling any of the SD.begin() or SPI.begin() functions.
void setup(void) {
  // setup all the SPI pins, ensure all the devices are deselected
  pinMode(4, OUTPUT); digitalWrite(4, HIGH);    // micro sd
  pinMode(6, OUTPUT); digitalWrite(6, HIGH);    // bank0
  pinMode(7, OUTPUT); digitalWrite(7, HIGH);    // bank1
  pinMode(10, OUTPUT); digitalWrite(10, HIGH);  // wiznet
  pinMode(53, OUTPUT); digitalWrite(53, HIGH);  // atmega2560 SS line
  ... more setup code
In effect this disables all the SPI devices until their various begin() functions were called to configure them.
Maybe this wasn’t the best solution, but since I implemented it the SRAM and SD card have been perfectly stable so I consider it case closed.
Coming up
This post takes me up to the present day. Right now I have a XRam kit to be built up, and a QuadRAM which was sold to me by a very kind blogger who wasn’t using it, sitting on my desk.
Both the XRam and QuadRAM are functionally identical and each can provide more that the 256kb of SRAM needed for this project which is effectively directly integrated into the atmega2560’s address space.